# Prestashop integration
This document explains how to integrate BTCPay Server into your PrestaShop store. If you do not have a store yet, follow this step by step article (opens new window) to create one from scratch.
To integrate BTCPay Server into an existing PrestaShop store, follow the steps below.
TIP
This document only applies to the latest v6 version of the module. Other versions:
# Server Requirements
Please ensure that you meet the following requirements before installing this plugin.
- You are using PHP 8.0 or higher
- Your PrestaShop is version 8.0 or higher.
- Your store must have HTTPS enabled and be publicly accessible.
- Your BTCPay Server is version 1.7.0 or higher
- The PDO, curl, gd, intl, json, and mbstring PHP extensions are available
- You have a BTCPay Server, either self-hosted or hosted by a third-party
- The BTCPay Server instance must have HTTPS enabled and be publicly accessible.
- You've a registered account on the instance
- You've a BTCPay store on the instance
- You've a wallet connected to your store
# Install BTCPay Plugin
- Download the latest BTCPay Server plugin (opens new window)
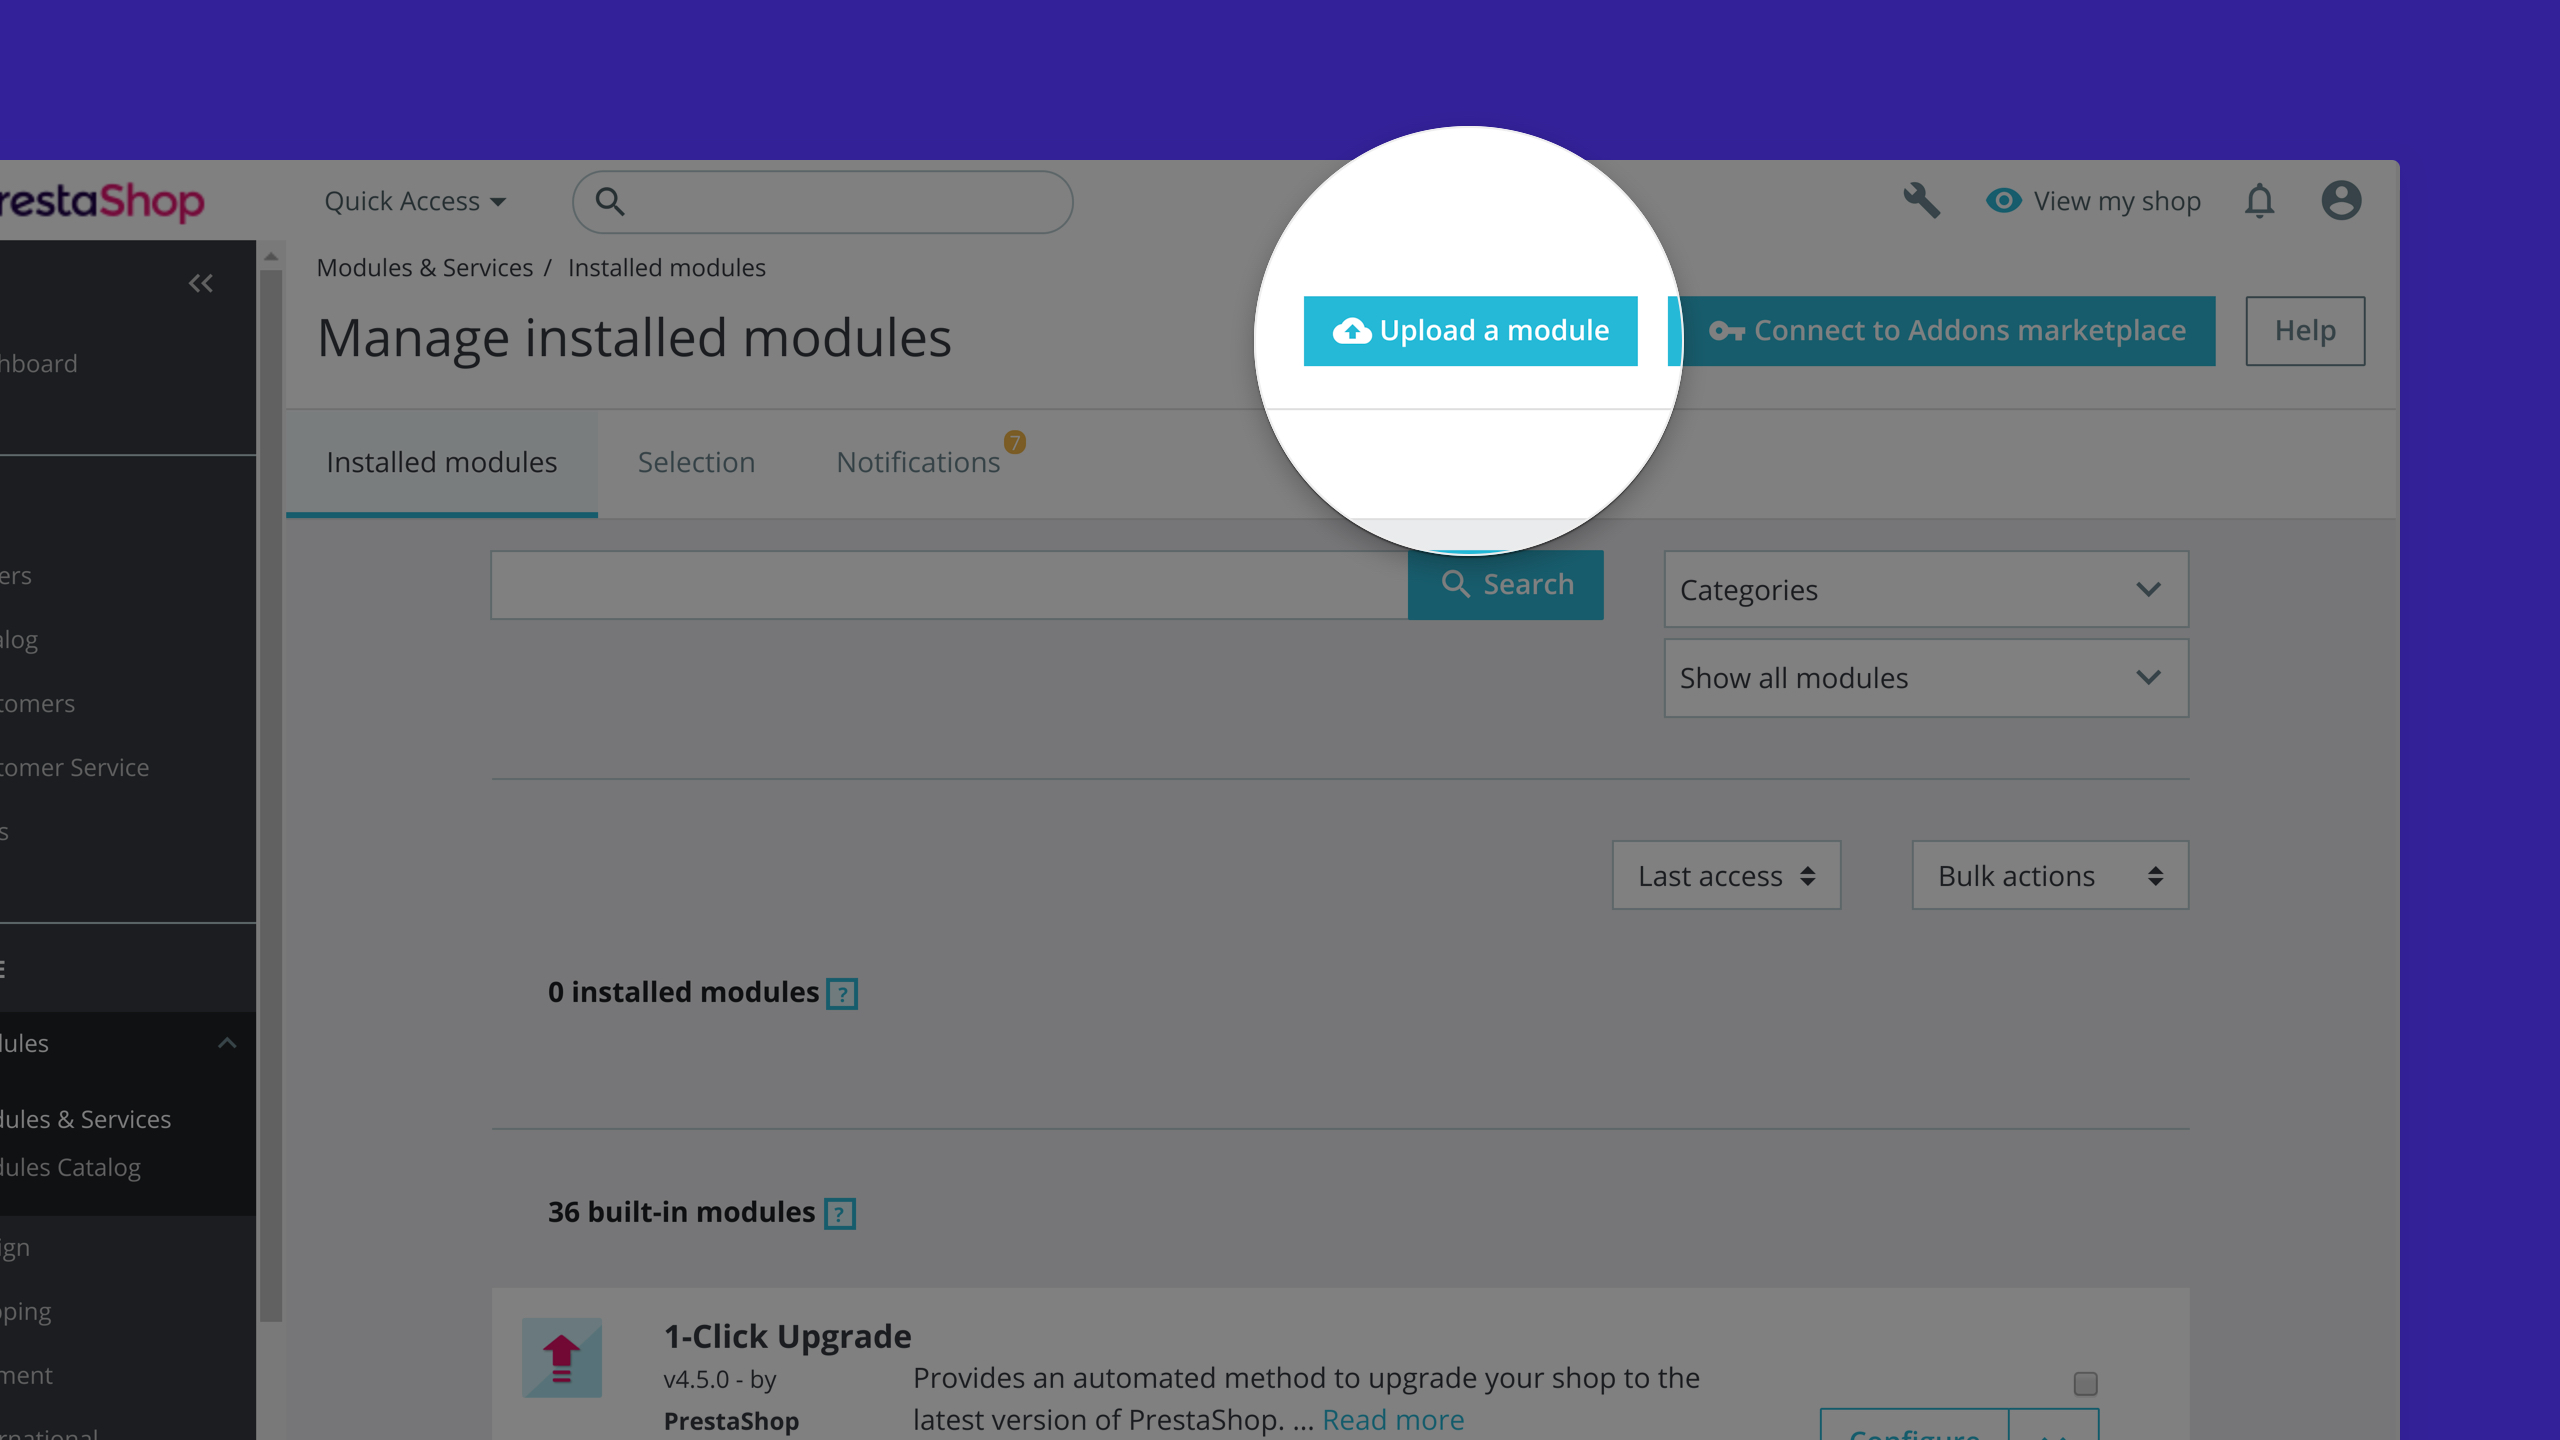
- PrestaShop > Modules > Module Manager > Upload a module
- Upload the
.zip-file you just downloaded - Click on
configureto setup the module

# Connecting the store
The Prestashop BTCPay Server module is a bridge between your server (the payment processor) and your e-commerce store. No matter if you're using a self-hosted or third-party solution from step 2, the setup process is identical.
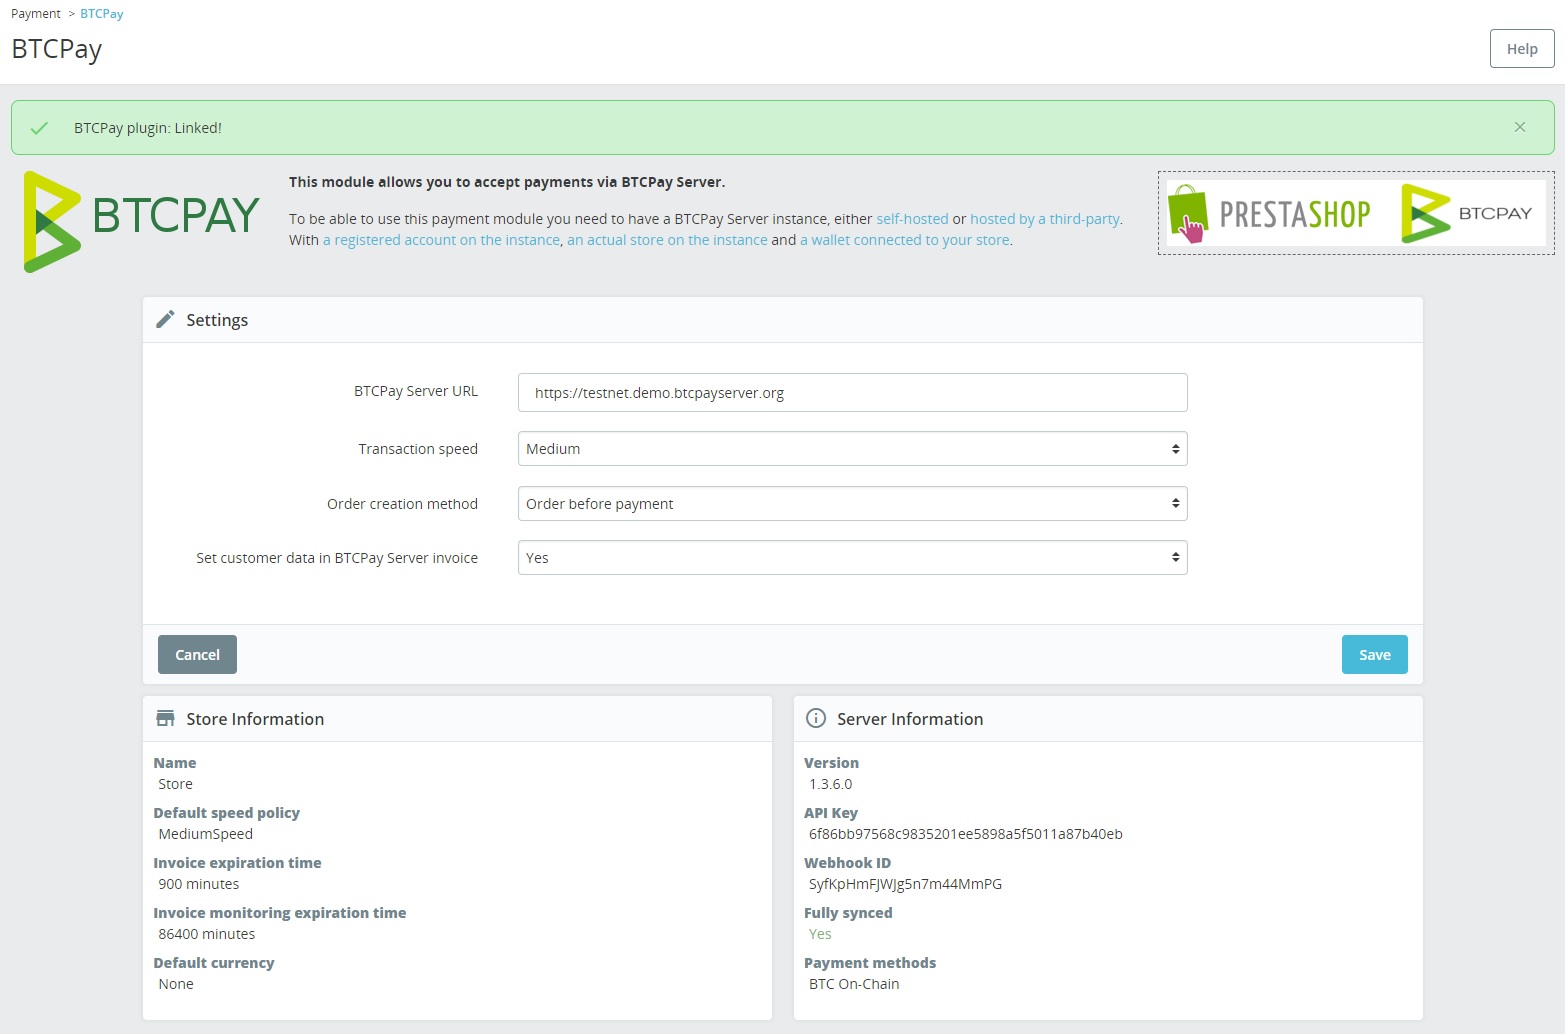
- In the
BTCPay Server URL-field, enter the full URL of your host (including the https) – for example https://testnet.demo.btcpayserver.org - Select the default transaction speed (this will change how much BTCPay recommends as transaction fee).
- Optional: Select the relevant order mode for your store (order is created before or after payment).
- Only relevant if you use a version before v5.1.0 as this logic has been removed.
- Select if you want to send customer metadata to your BTCPay server instance for bookkeeping.
- Press
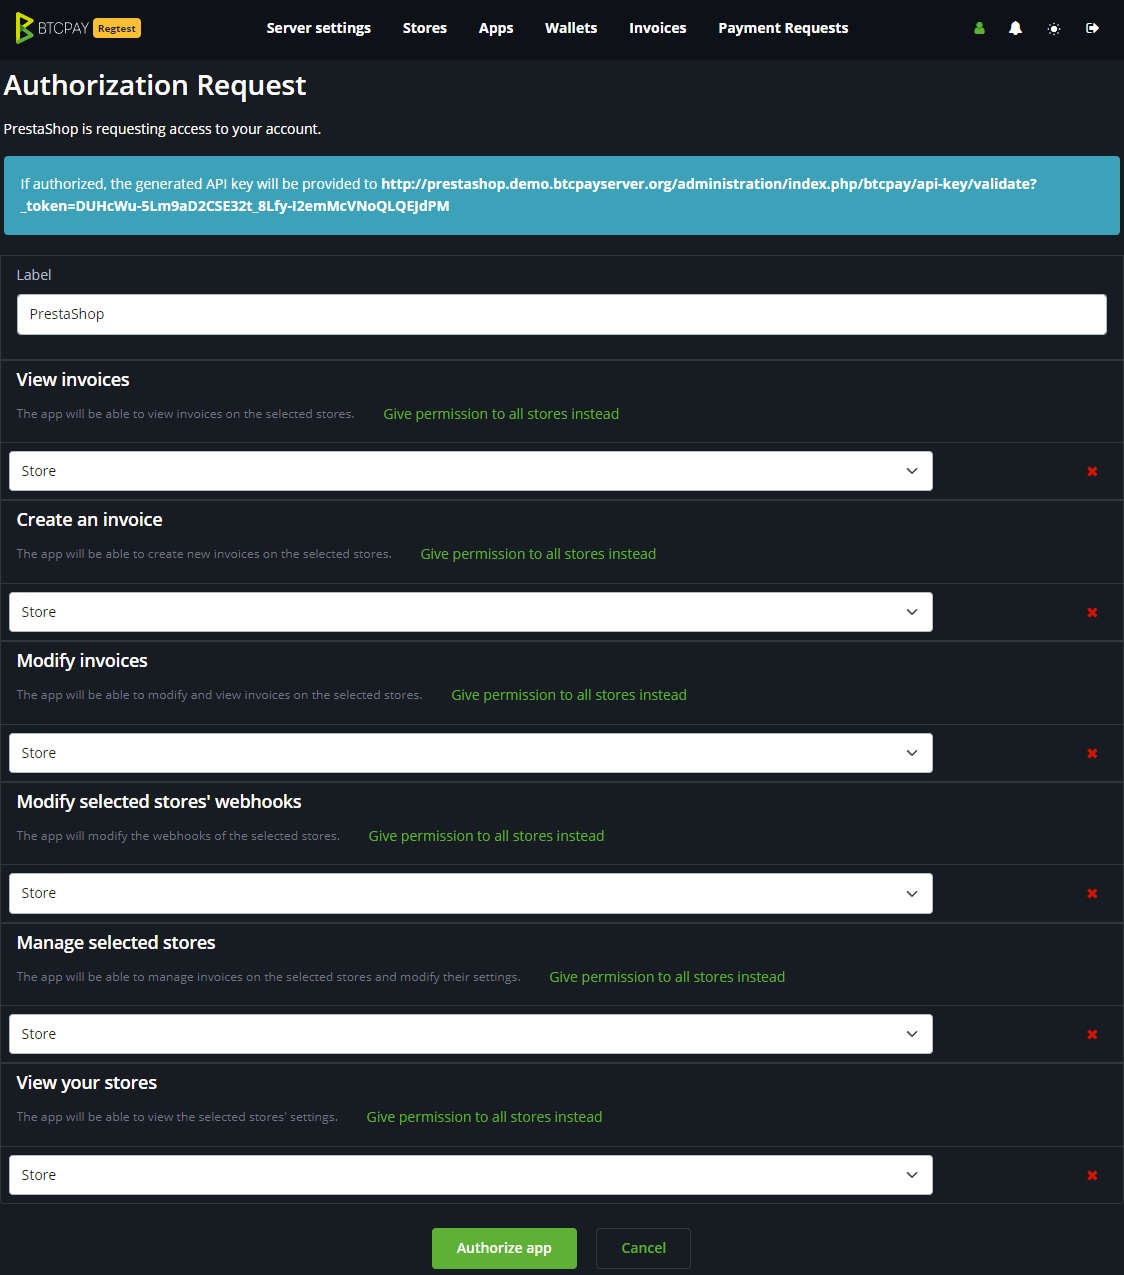
Connectto save your settings and be redirected to your BTCPay Server instance to create an API key. - When creating the API key, make sure to give the permissions to a specific store (multiple stores are not supported).

- Press the
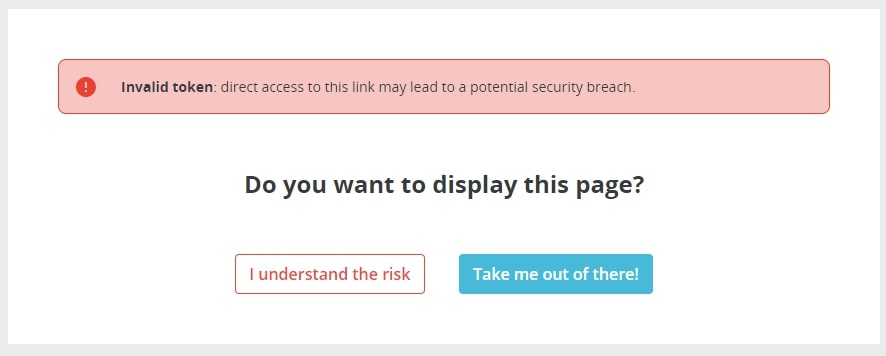
Authorize app-button after which you will be redirected back to your Prestashop store. If you get an "Invalid Token"-popup, please make sure that PrestaShop and BTCPay Server both use HTTPS and have proper hostnames (see Server Requirements).

- Prestashop will try and create a connection to your BTCPay Server instance. 9. A message will be shown if the connection was successful (but it is smart to make a test purchase).

TIP
Redirecting back from BTCPay Server sometimes fails due to PrestaShop weirdness. If it does, you can still use this plugin by copying the API key from /account/apikeys and pasting it in the form.
# Create the API key yourself
If preferred, you can also make an API key yourself by creating it at /account/addapikey. If you are going to make an API key yourself, make sure that it has the following permissions for a singluar store:
btcpay.store.canmodifystoresettingsbtcpay.store.webhooks.canmodifywebhooksbtcpay.store.canviewstoresettingsbtcpay.store.cancreateinvoicebtcpay.store.canviewinvoicesbtcpay.store.canmodifyinvoices
# 3. Contribute
BTCPay is built and maintained entirely by volunteer contributors around the internet. We welcome and appreciate new contributions.
Contributors looking to help out, before opening a pull request, please create an issue (opens new window) or join our community chat (opens new window) to get early feedback, discuss the best ways to tackle the problem and to ensure there is no work duplication.
# PrestaShop Support
PrestaShop support can be found through its official channels.
