# BTCPay Server Apps
The primary purpose of BTCPay Server is to remove dependencies on trusted third-parties. The Apps are built in applications that obsolete central-authorities and allow users an easy way to extend the use case of the software. Users can self-host all sorts of customizable applications that work out of the box.
To create an app, go to Apps > Create a new app. Apps are store-dependent, which means that each app needs to be connected to a store.
# Point of Sale App
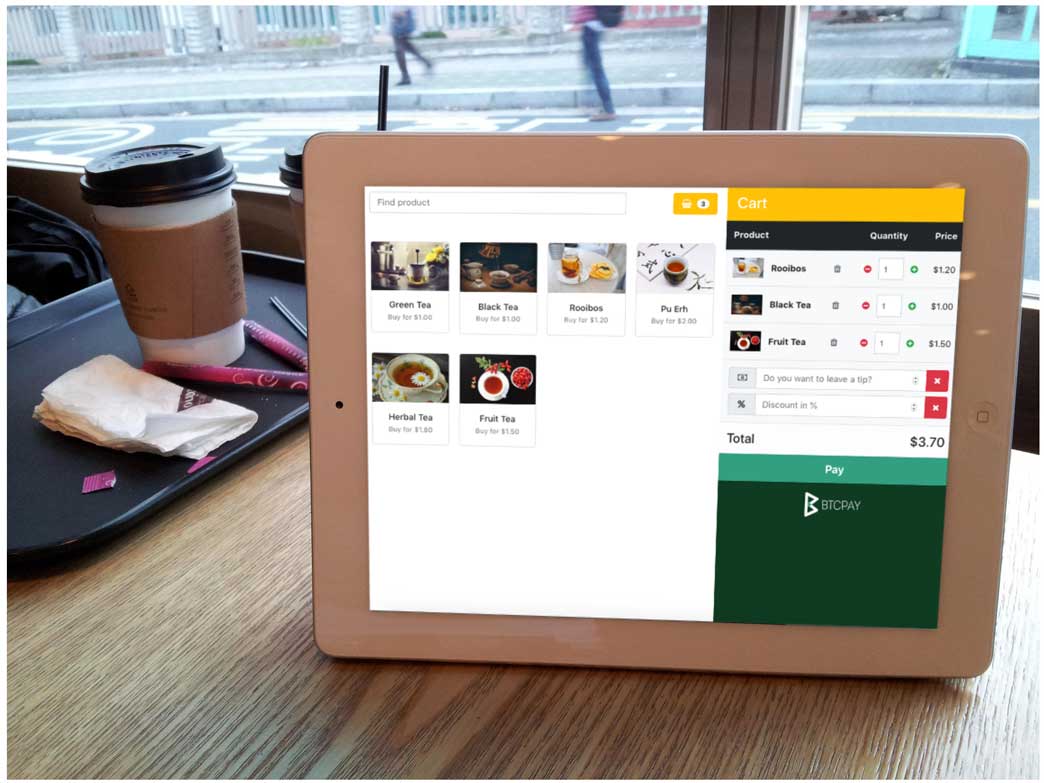
The web-based PoS app allows users with brick and mortar stores to readily accept cryptocurrencies without fees or a third-party, directly to their wallet. The PoS can be displayed easily on tablets or any other devices which support web browsing. Users can easily create a homescreen shortcut for a quick access to the web-app.

Adding new products is easy. The app has a shopping cart feature, tips, product inventory, custom payment options and more.
The Point of sale app can also be used to receive donations, tips or even as a small e-commerce shop, depending on the options or customizations applied.
Curently, the Point of Sale app supports three different views:
- A
Staticview representing only the items for sale. - A
Cartview including items for sale and a cart for checkout. - A
Lightview consisting only of a keypad for easy and quick payments (Starting from v1.0.5.6 (opens new window)).
To get your first Point of Sale app running, follow theses few simple steps:
- Go to
AppsandCreate a new app - Add a
namefor your app - Choose
app type> Point Of Sale - Select the
storeto associate with the app. - Customize your PoS by choosing a
view(Static, Cart, Light), adding your ownitemswith prices, photos, and a description. - Click
Save Settings. - Click
View Appto view your PoS (Your customers can access the PoS through that link).
You can change the appearance of your Point of Sale app by following the theme customization guide.
# Crowdfunding App
Crowdfunding is an application which you can launch from BTCPay Server interface that allows you to create a self-hosted funding campaign, similar to Kickstarter or Indiegogo. Unlike traditional crowdfunding platforms, the creator of the campaign is the owner of the platform. Funds go directly to the creator’s wallet without any fees.
- Go to > Apps
- Add a name of your app
- Choose app type > Crowdfund
- Select the store to associate with the app.
- Customize your Crowdfund by adding your own perks with prices, photos, and description.
- Check the box > Allow crowdfund to be publicly visible
- Click "Save Settings".
- Click "View App" to view your Crowdfund (Contributors can access the crowdfund through that link).
If you would like to provide digital or physical products to the backers of your crowdfunding campaign, you can integrate WooCommerce store into it. You can also set limits on contribution perks using the inventory feature.
# Payment Button
Easily-embeddable HTML and highly-customizable payment buttons allow users to receive tips and donations. Online stores can also integrate payment buttons. When a site visitor clicks on the button, BTCPay displays the invoice.
- In your left menu bar, under the "PLUGINS" section, select "Pay Button".
- Allow anyone to create invoices.
- Customize your button.
- Copy the generated form and embed it on your website.
