
# Pull Payments
Watch the pull payments overview video:
A pull payment lets a store authorize a recipient to claim up to a specified amount. Instead of the store asking for a destination and immediately pushing funds, it shares a link where the recipient chooses when, how much, and where to receive the money.
Pull payments are useful for refunds, contractor or freelancer payments, withdrawal balances, grants, patronage, and other cases where the recipient should provide the payout destination. Creating a pull payment does not reserve or transfer funds. Each claim creates a payout that the store must approve, if needed, and pay from a compatible wallet or payment source.
# How It Works
- The store creates a pull payment with a claim limit and allowed payout methods.
- The store shares the pull payment URL with the recipient.
- The recipient enters an amount and destination, then submits a claim.
- BTCPay Server creates a payout and reduces the amount still available to claim.
- The store approves the payout unless claims are configured for automatic approval.
- The store sends the approved payout. Multiple payouts can be selected and processed together.
Approval and payment are separate steps. Automatic approval does not automatically send funds.
# Create a Pull Payment
Open Pull Payments for the selected store and select Create Pull Payment.
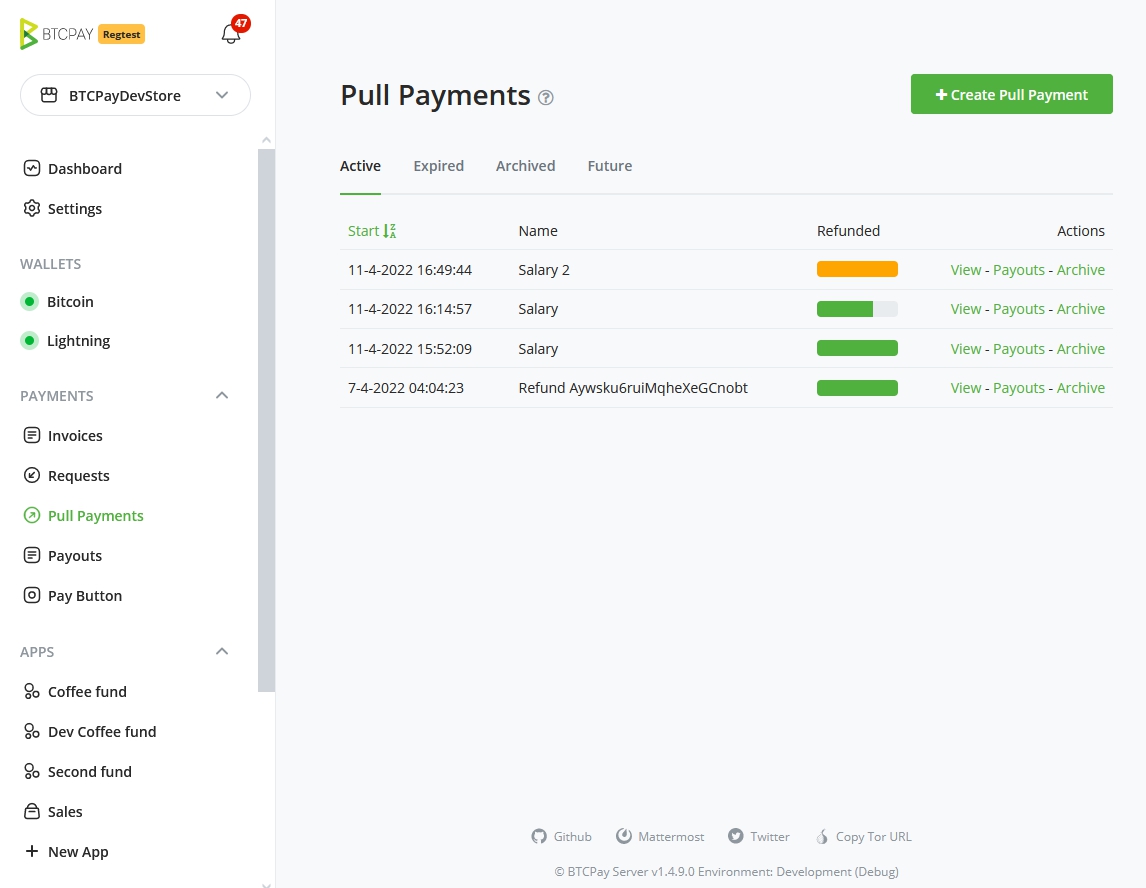
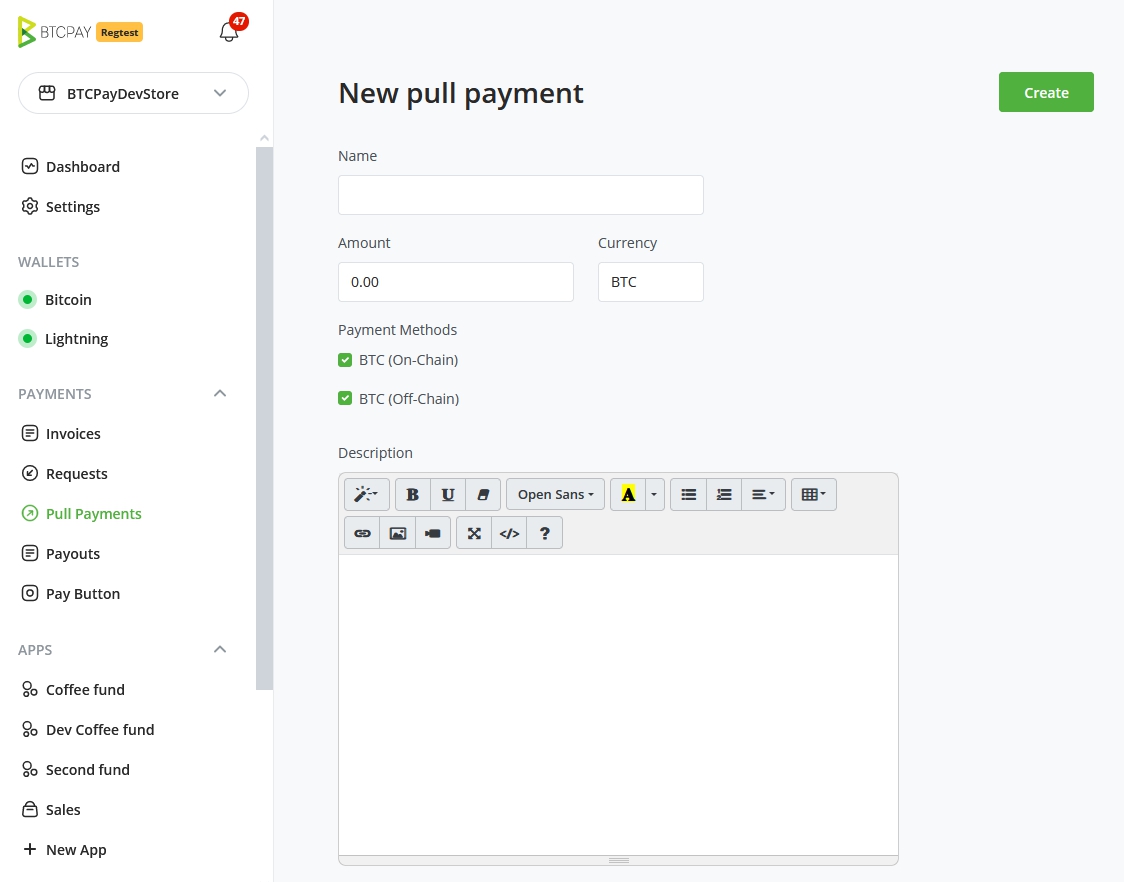
Configure the pull payment:
- Name identifies it to the store and recipient.
- Amount and Currency set the total claim limit.
- Automatically approve claims moves submitted claims directly to the awaiting-payment state. Leave it disabled when each claim should be reviewed.
- Payout Methods determine which destinations the recipient may use, such as on-chain Bitcoin or Lightning.
- Description provides instructions or context on the public claim page.
- Minimum acceptable expiration time for BOLT11 rejects Lightning invoices that expire too soon for the payout to be processed.
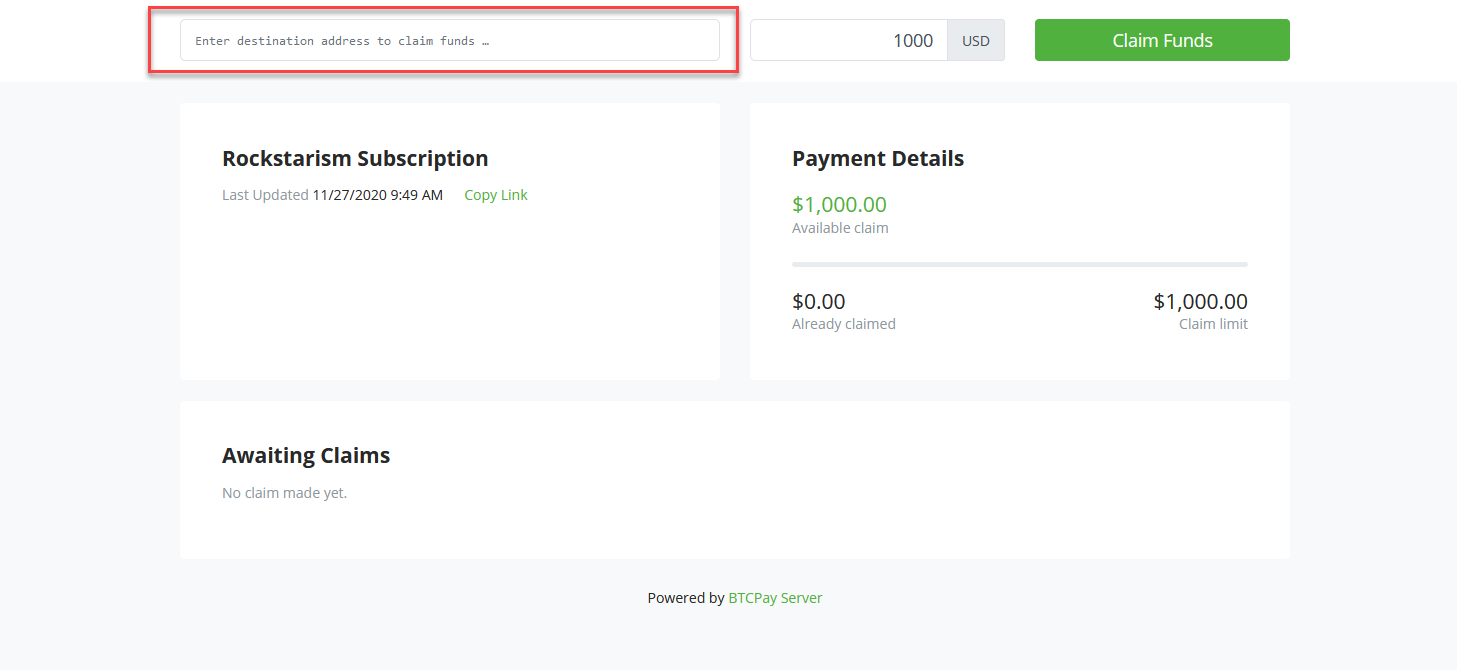
After creating the pull payment, open View and share its public URL with the recipient.
# Submit a Claim
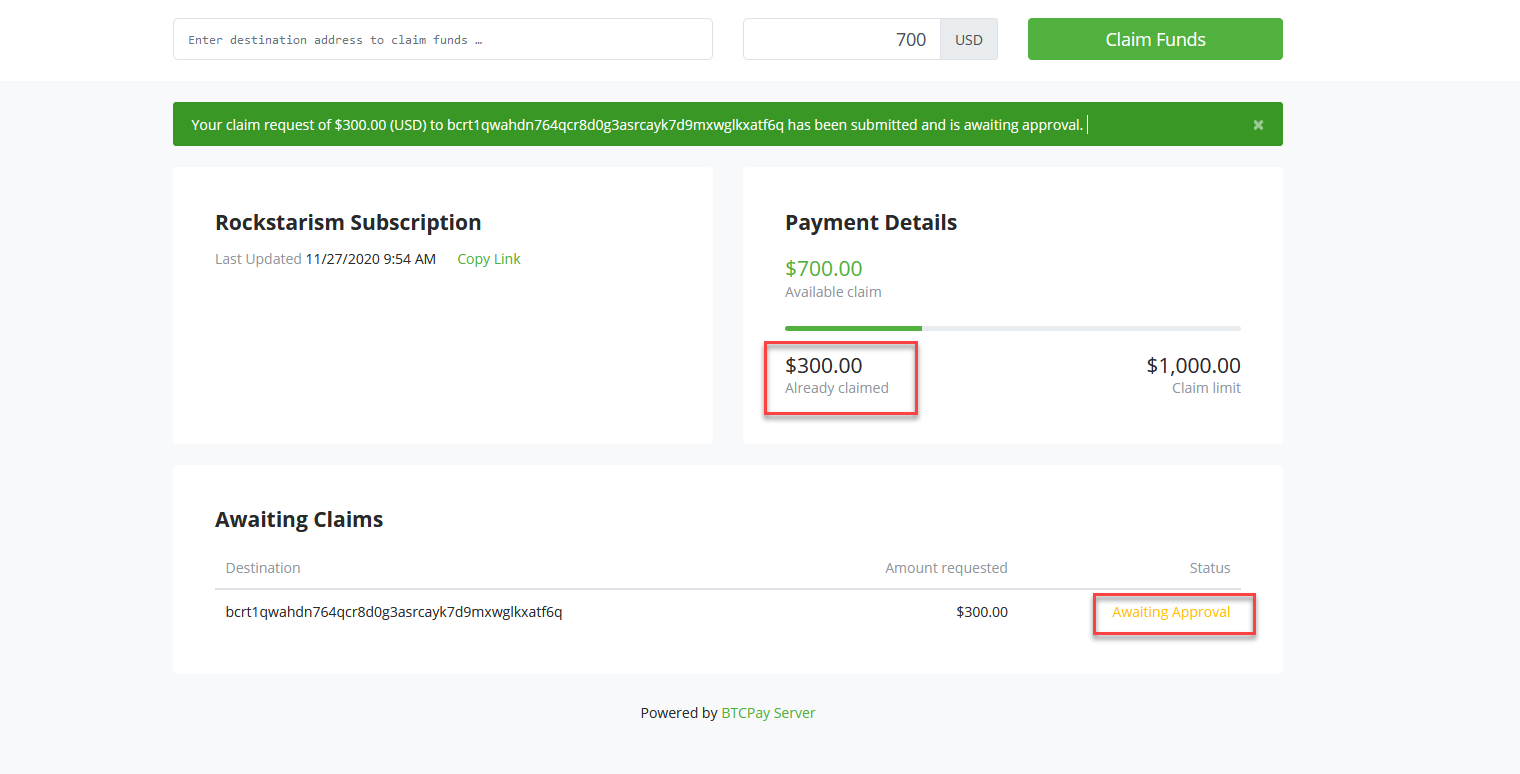
The recipient opens the shared page, selects an allowed payout method, enters a destination and amount, and selects Claim Funds. The page shows the claim limit, amounts already claimed, remaining amount, and claim statuses.
A submitted claim becomes a payout. Unless automatic approval is enabled, its status remains Awaiting Approval until the store reviews it.
Treat the claim link as sensitive. Anyone who has it may submit a claim against the available limit, although the store can reject an unapproved payout.
# Approve and Pay Payouts
BTCPay Server notifies the store when a payout awaits approval. Open Payouts, select the claims to process, and choose an action:
- Approve selected payouts fixes their amounts and moves them to awaiting payment without sending funds.
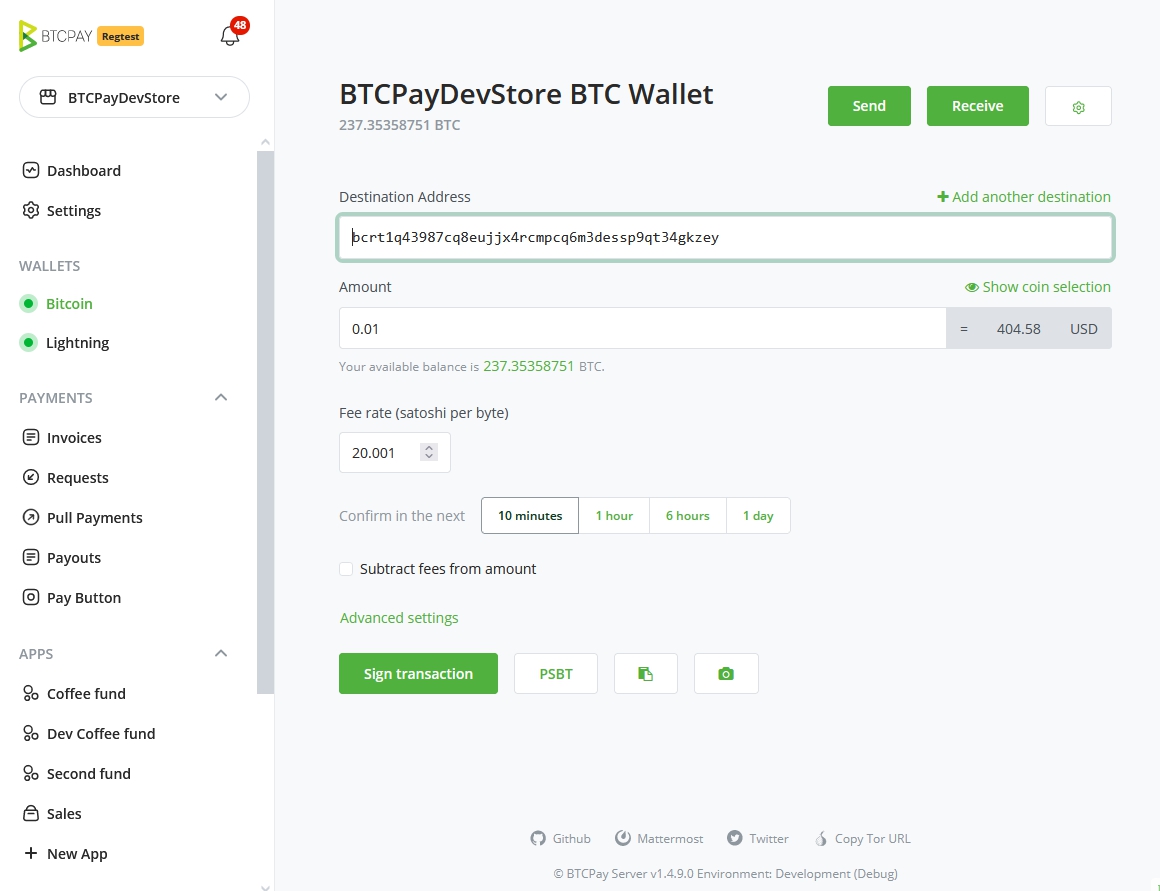
- Approve & Send selected payouts approves them and starts the payment flow.
- Cancel selected payouts rejects them.
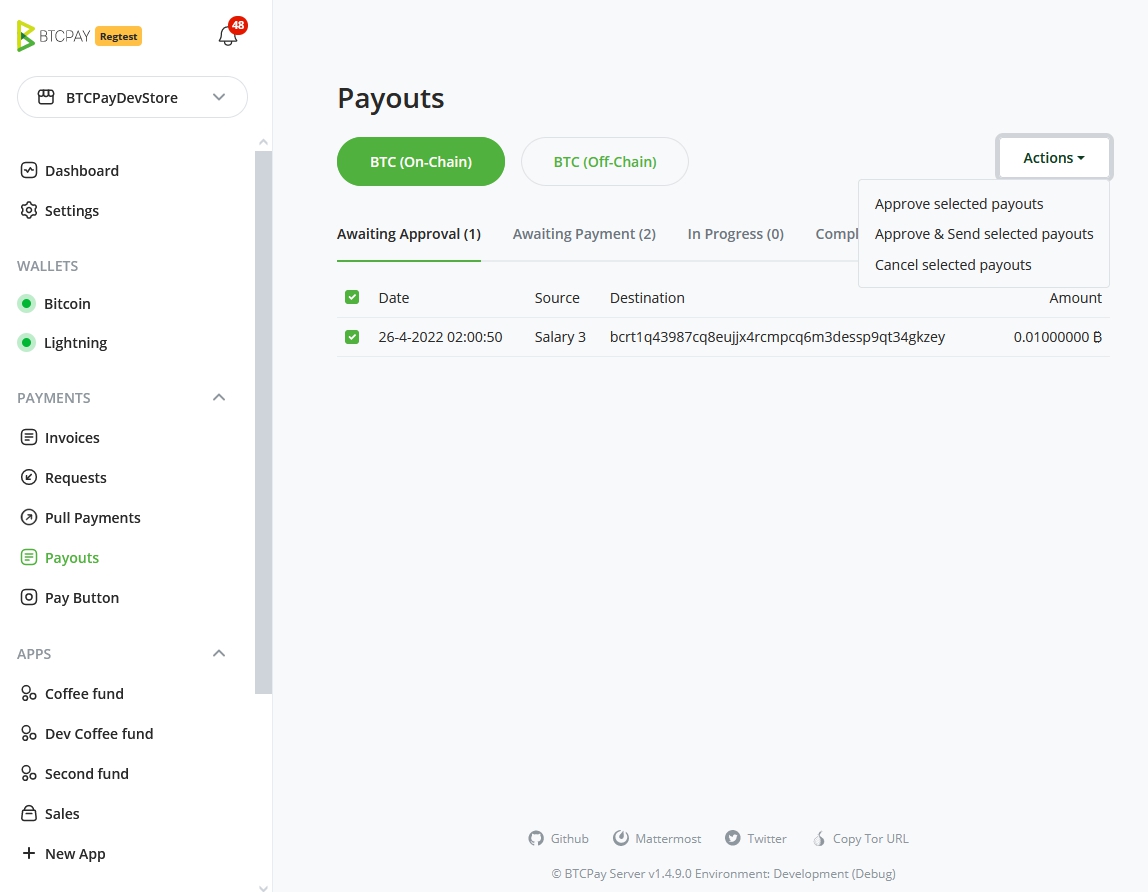
For a fiat-denominated pull payment, approval converts the claim using the store's current exchange rate. That rate remains fixed if the payout is paid later. Review the destination, amount, exchange rate, and network fee before signing or sending.
# Refunds
Refunds use the same pull-payment flow. From a paid invoice, the store creates a refund and shares its claim link with the customer. The customer supplies a destination, and BTCPay Server creates a payout for the store to approve and send. This avoids asking the customer to send a destination through email or reusing the address from the original payment.
# API Automation
The Greenfield API exposes pull payments and payouts for integrations that need
to create claim links, submit claims, or process payouts programmatically. See
the target instance's /docs or the hosted API reference (opens new window) for current operations and permission requirements.