# BTCPay Server integration for Wix
This guide will show you how you can enable Bitcoin payments using BTCPay Server on your Wix store. At the time of writing it is not possible to package this into a Wix app, so you will need to follow the steps below and copy and paste the code into your Wix editor.
# Requirements
- You have a Wix (opens new window) account and online store up and running
- You need to have a Wix subscription that includes eCommerce, e.g. Core or Business
- You have a BTCPay Server version 1.10.0 or later, either self-hosted or hosted by a third-party.
- BTCPay needs to be reachable from the internet via a domain, e.g. https://mainnet.demo.btcpayserver.org
- You've a registered account on the instance
- You've a BTCPay store on the instance
- You've a wallet connected to your store and/or Lightning Network enabled or connected.
# Create a payment provider service plugin (PPSP)
- In your Wix site, open your Wix Editor.
- At the top click on "Dev Mode" and the "Turn on Dev Mode" button to enable the developer mode.

- Now on the left side, click on the
{ }icon to open the code editor. - In the section "Service Plugins" click on the (+) sign and select "Payment"
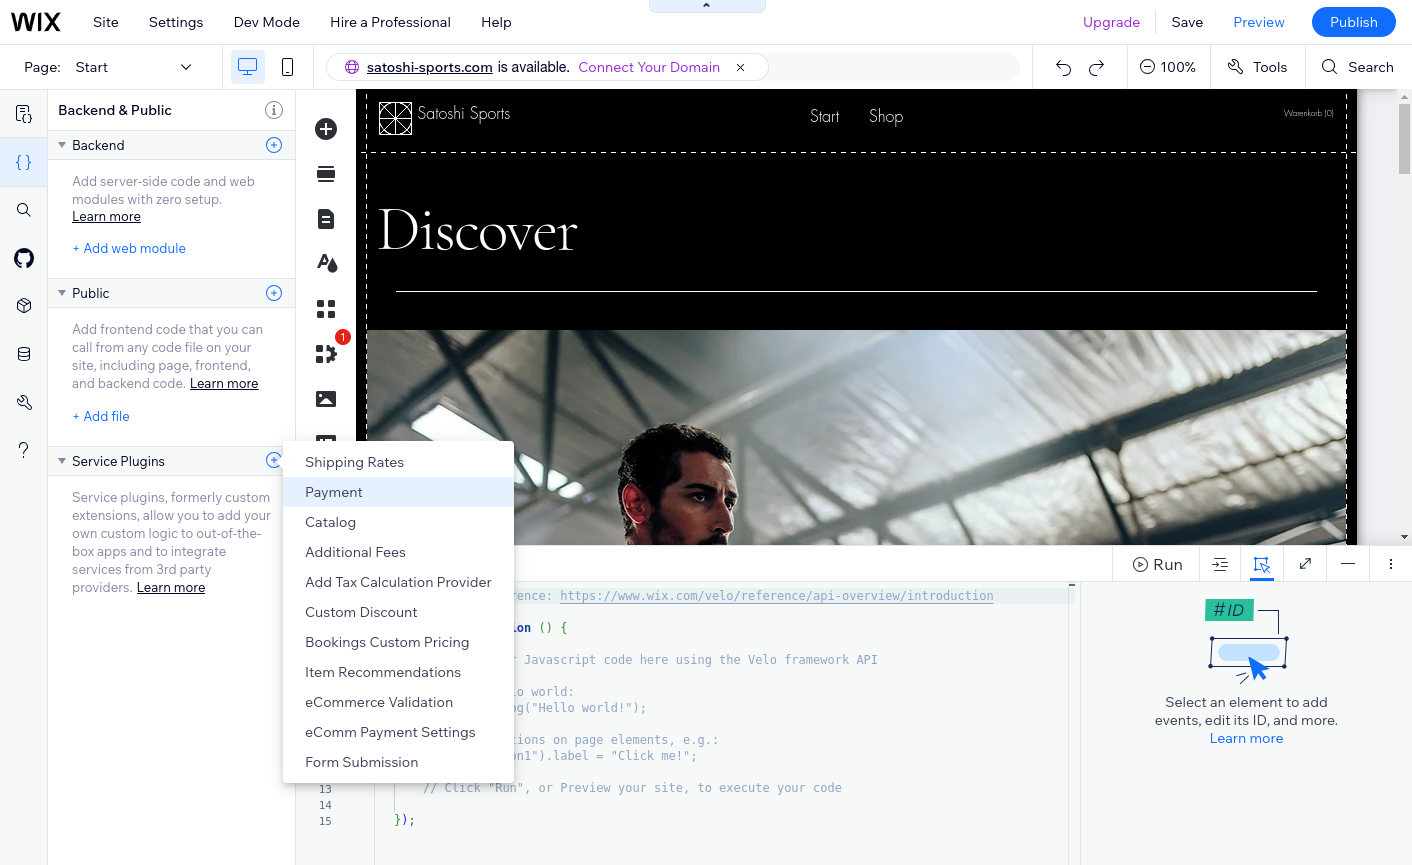
- On the following screen, click "Start now"
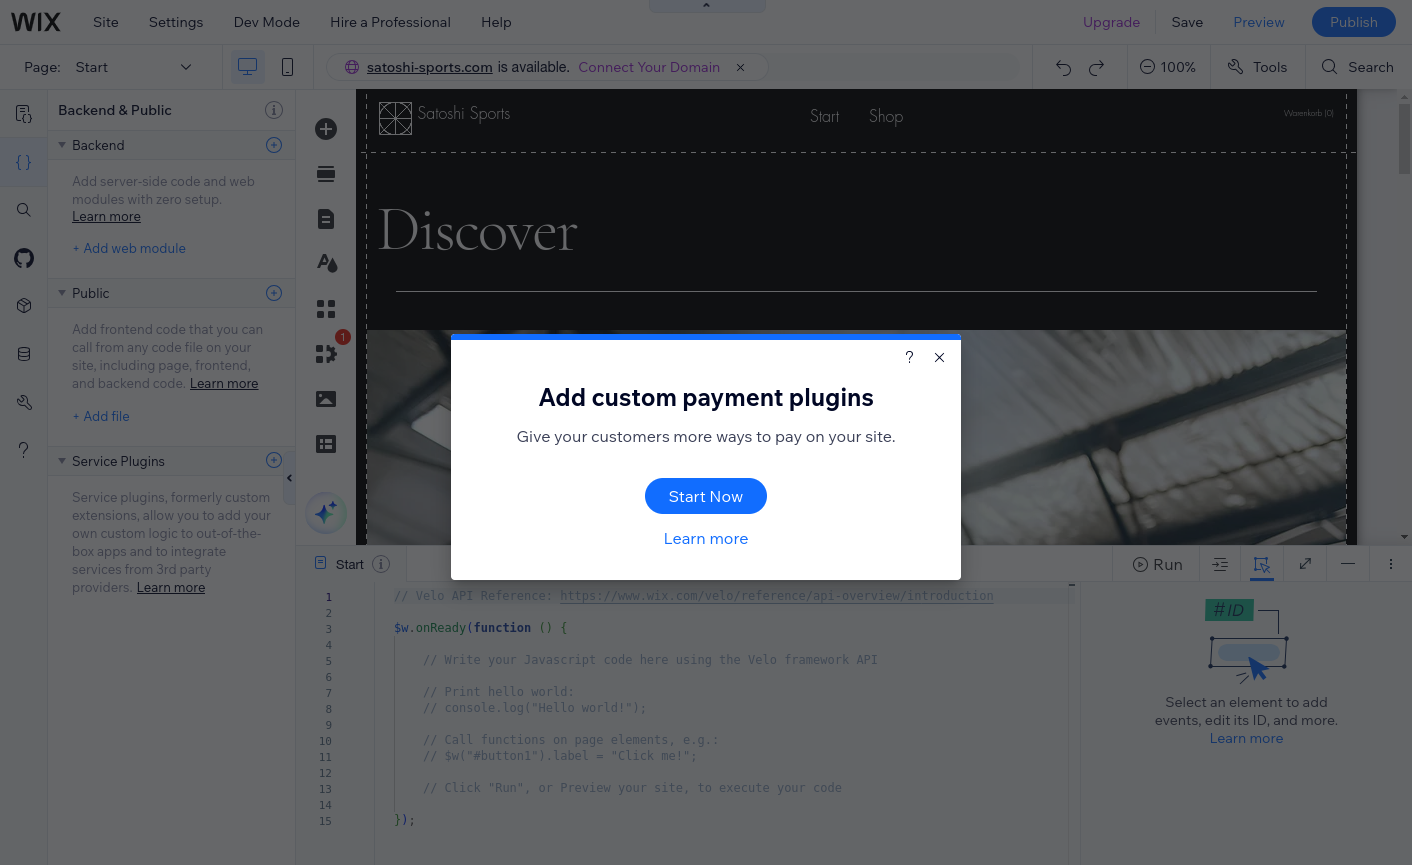
- On the legal terms page, check the terms and click "Accept"
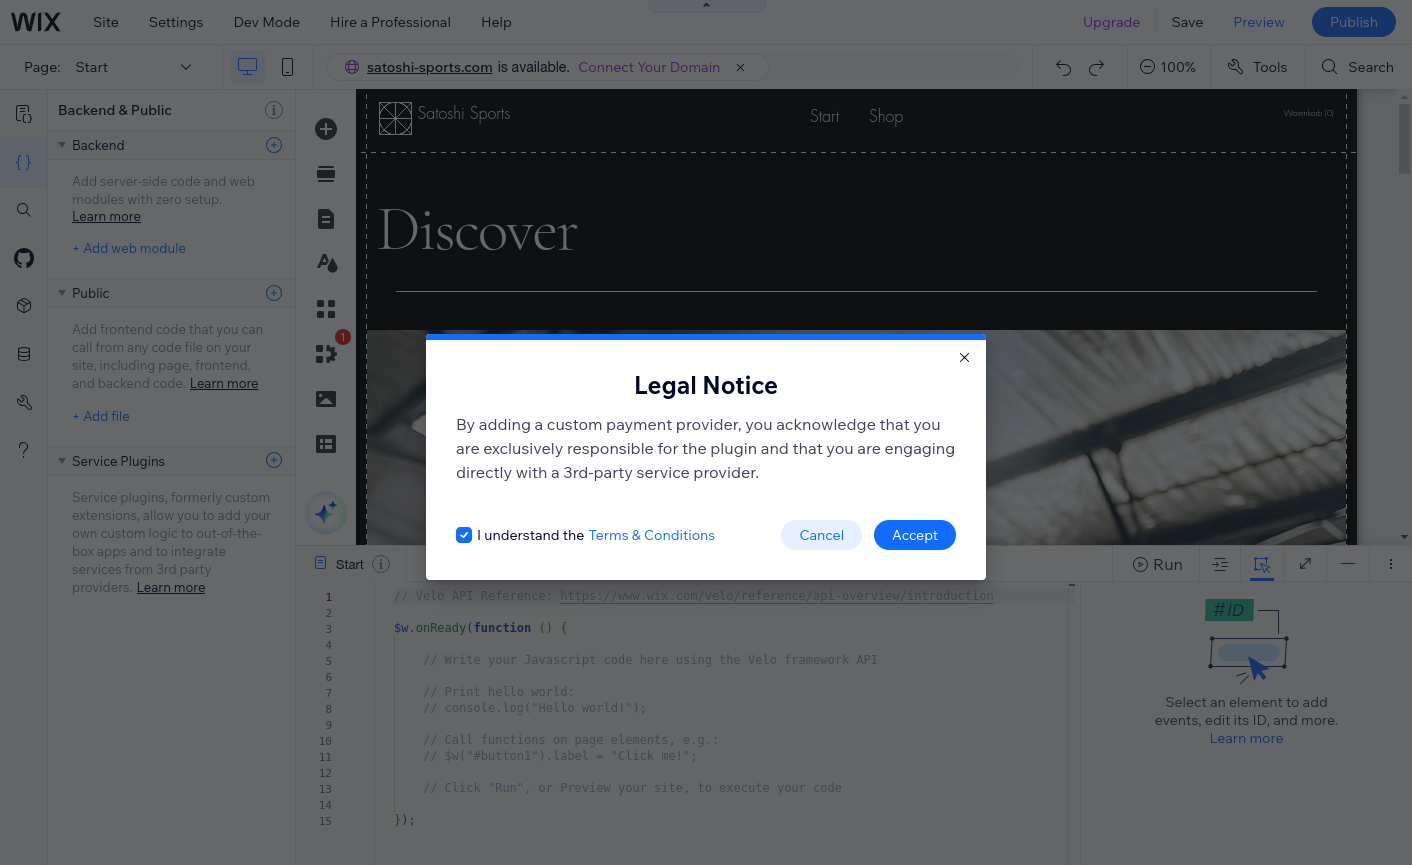
- Now enter the name of the plugin: "BTCPay" (you can use any name but this will make it easier to follow the guide). Then, click "Add & Edit Code":
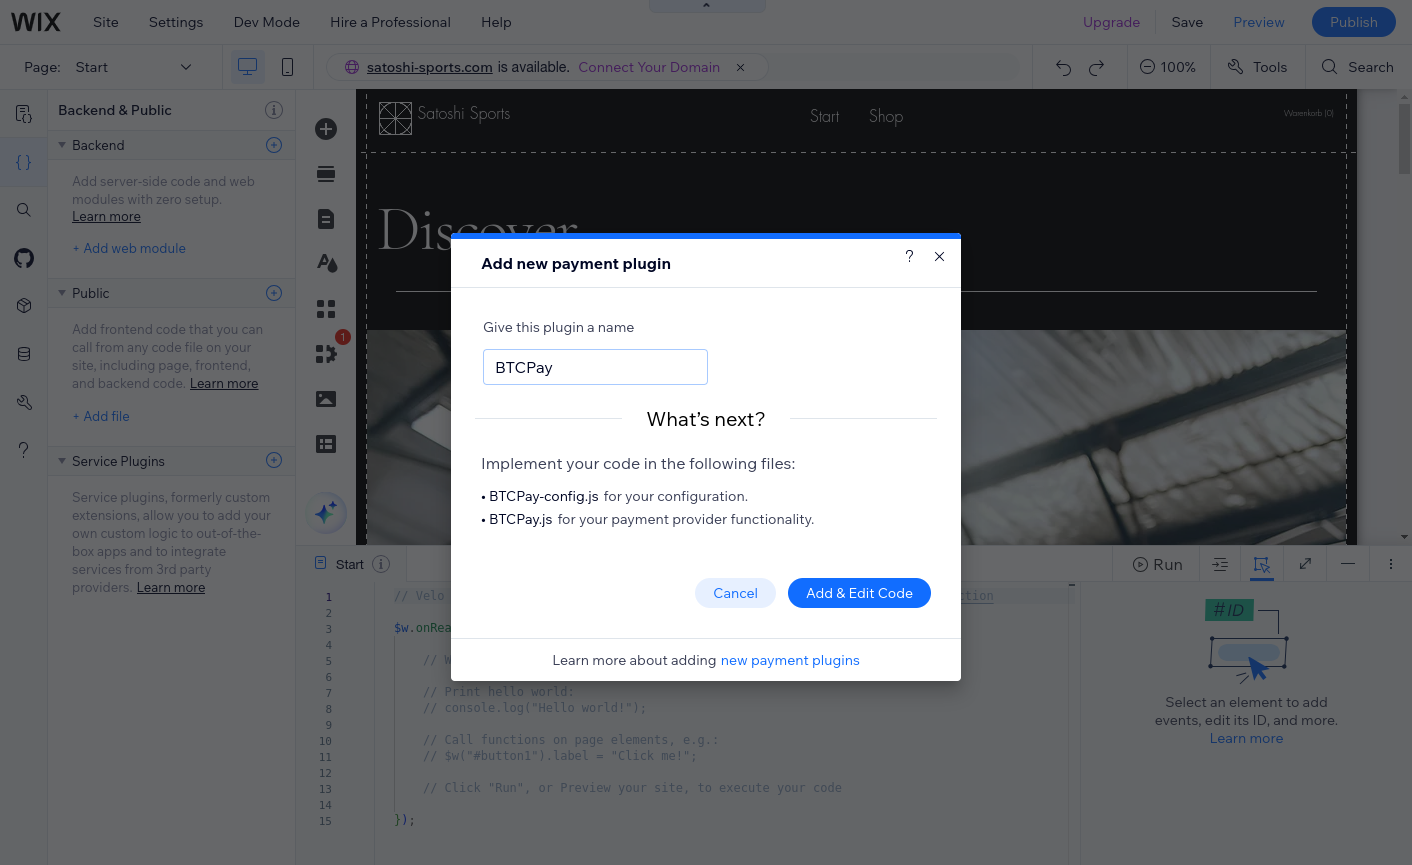
- This created the directory "BTCPay" containing two files:
BTCPay.jsandBTCPay-config.jswhich is open in the editor.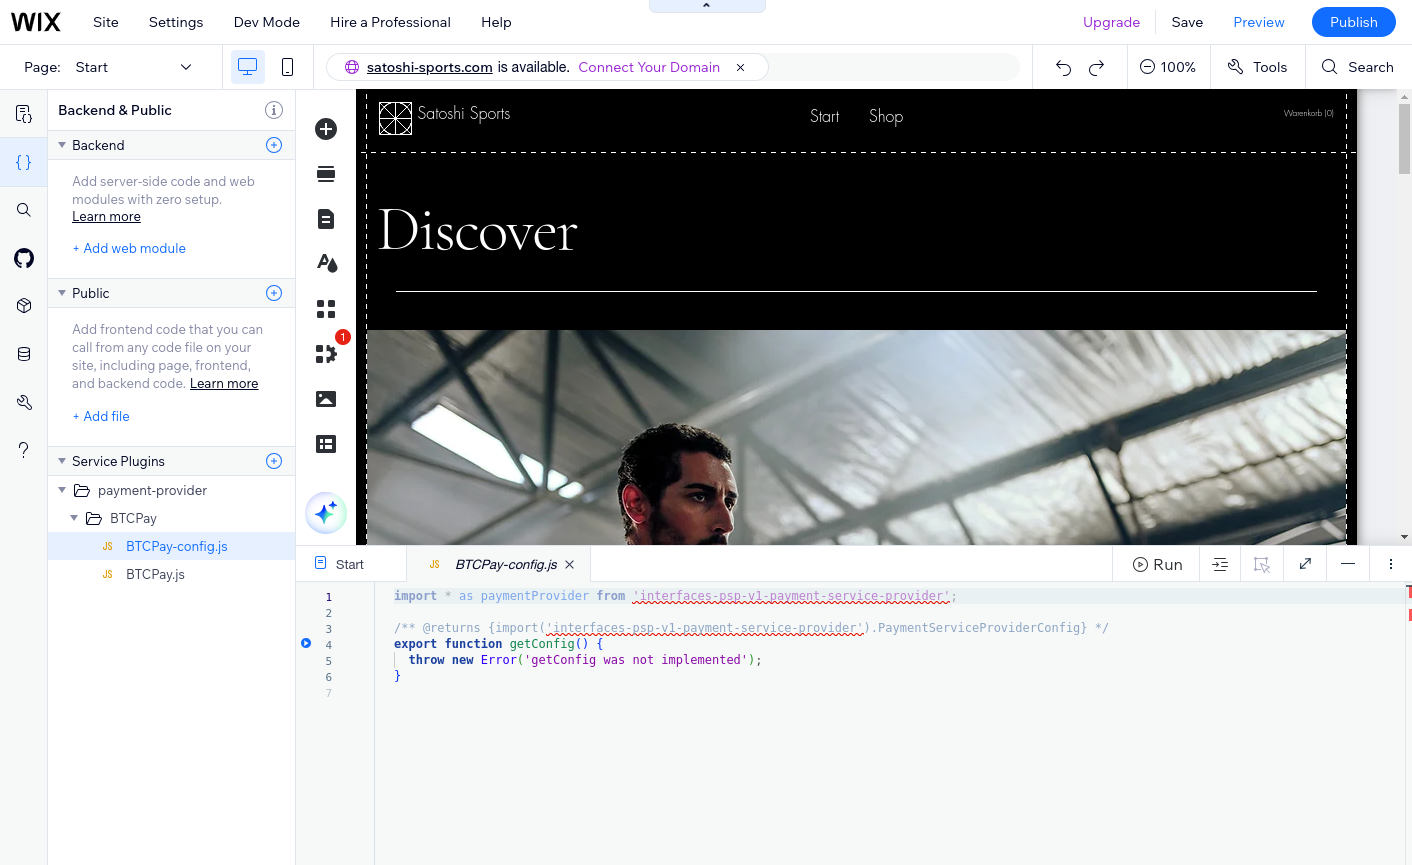
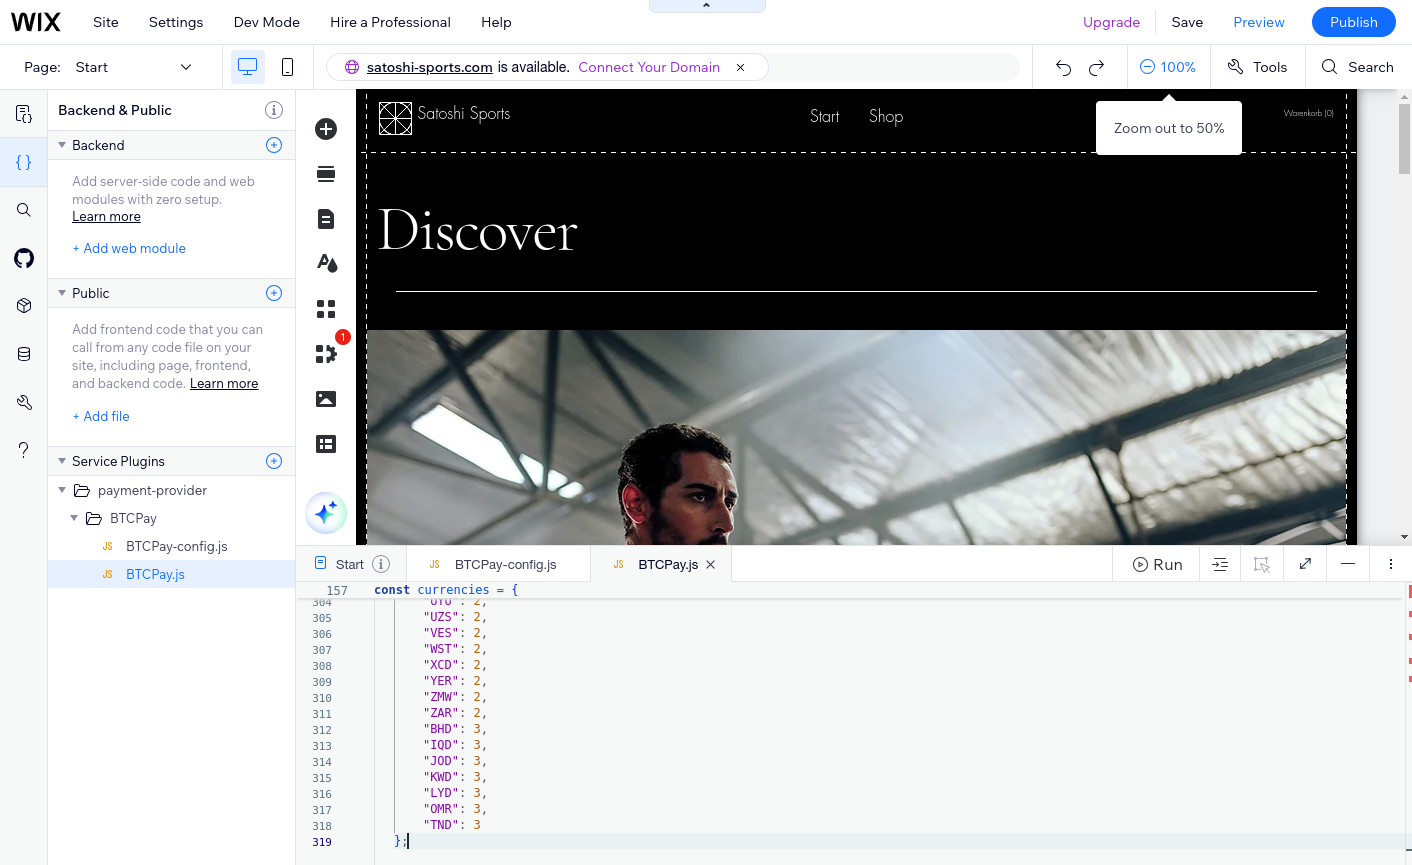
- Next steps are to copy the contents of those two files from our Git repository (opens new window). You can see the same data structure as on your wix editor. In the
BTCPay-config.jsfile, paste the code from the same file on our Git repository: BTCPay-config.js (opens new window). Easiest to click the "Copy raw file" icon.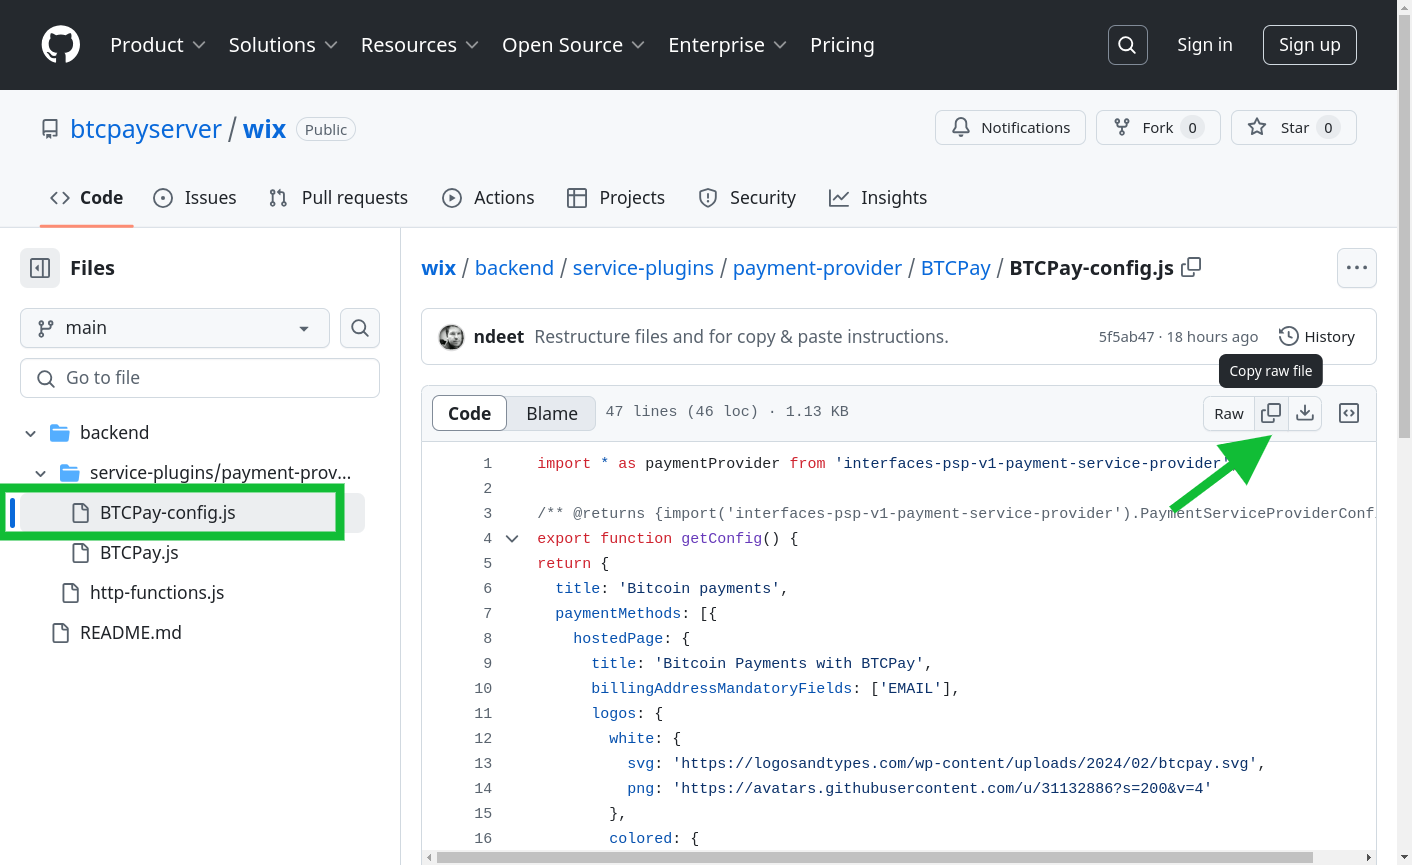
- Make sure you delete example code on the
BTCPay-config.jsfile in the wix editor before pasting the new code.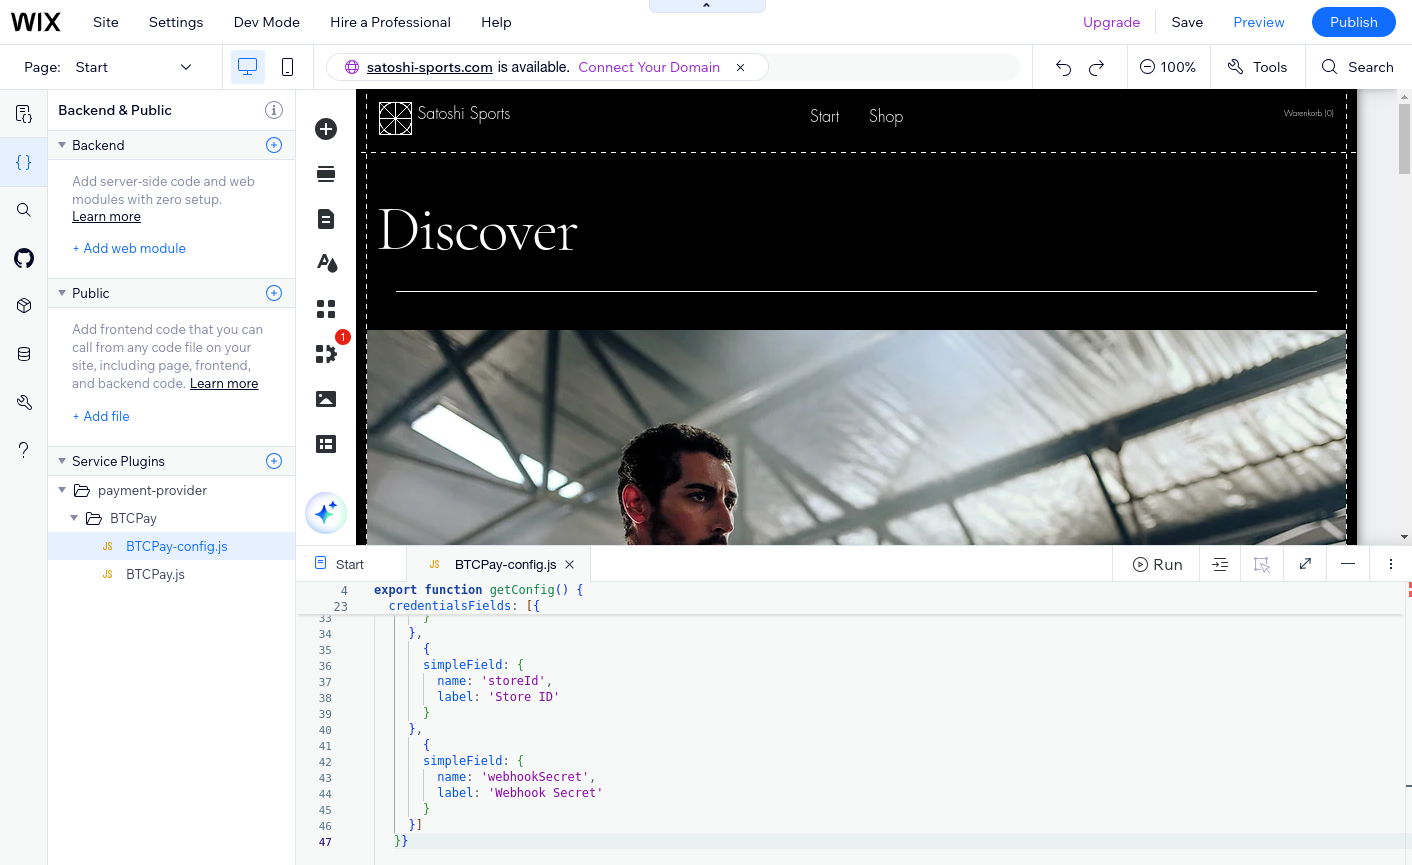
- Now, open the
BTCPay.jsfile in the wix editor and paste the code from our Git repository: BTCPay.js (opens new window). Do not forget to remove all the example code from the file before pasting the copied code.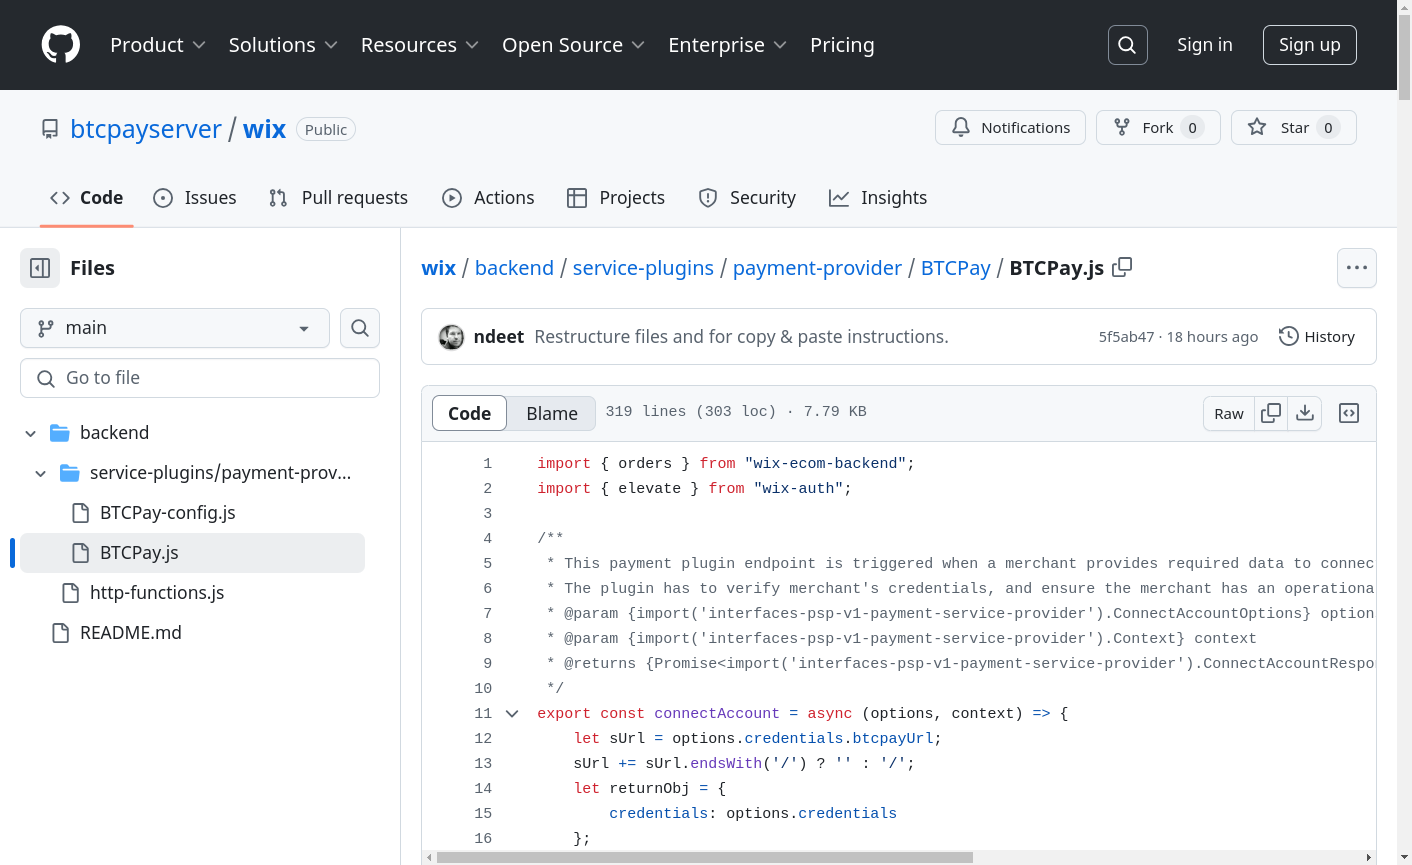
- Now we need to add the
http-functions.jsfile to thebackenddirectory. To do so, in the "backend" section of your editor click again on the (+) icon and select "Expose Site API" which creates the mentionedhttp-functions.jsfile. Note: If you already have that file present then you can skip this step.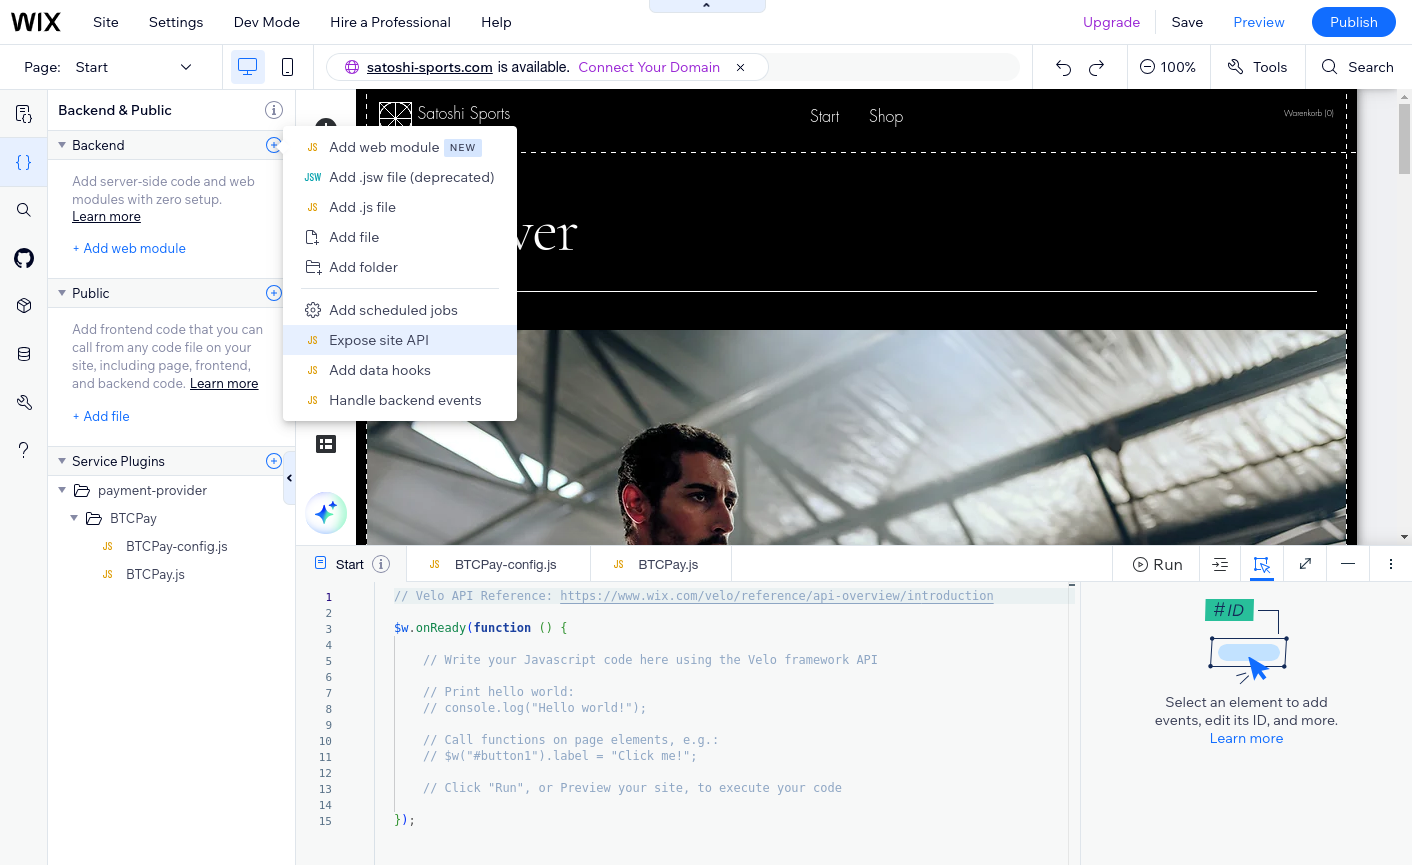
- Copy the code from our Git repository: http-functions.js (opens new window). If you already had a
http-functions.jsfile, make sure to add the code from the Git repository to the existing file add the copied code below the existing code. If not then make sure you delete all the example code before pasting the code from GitHub.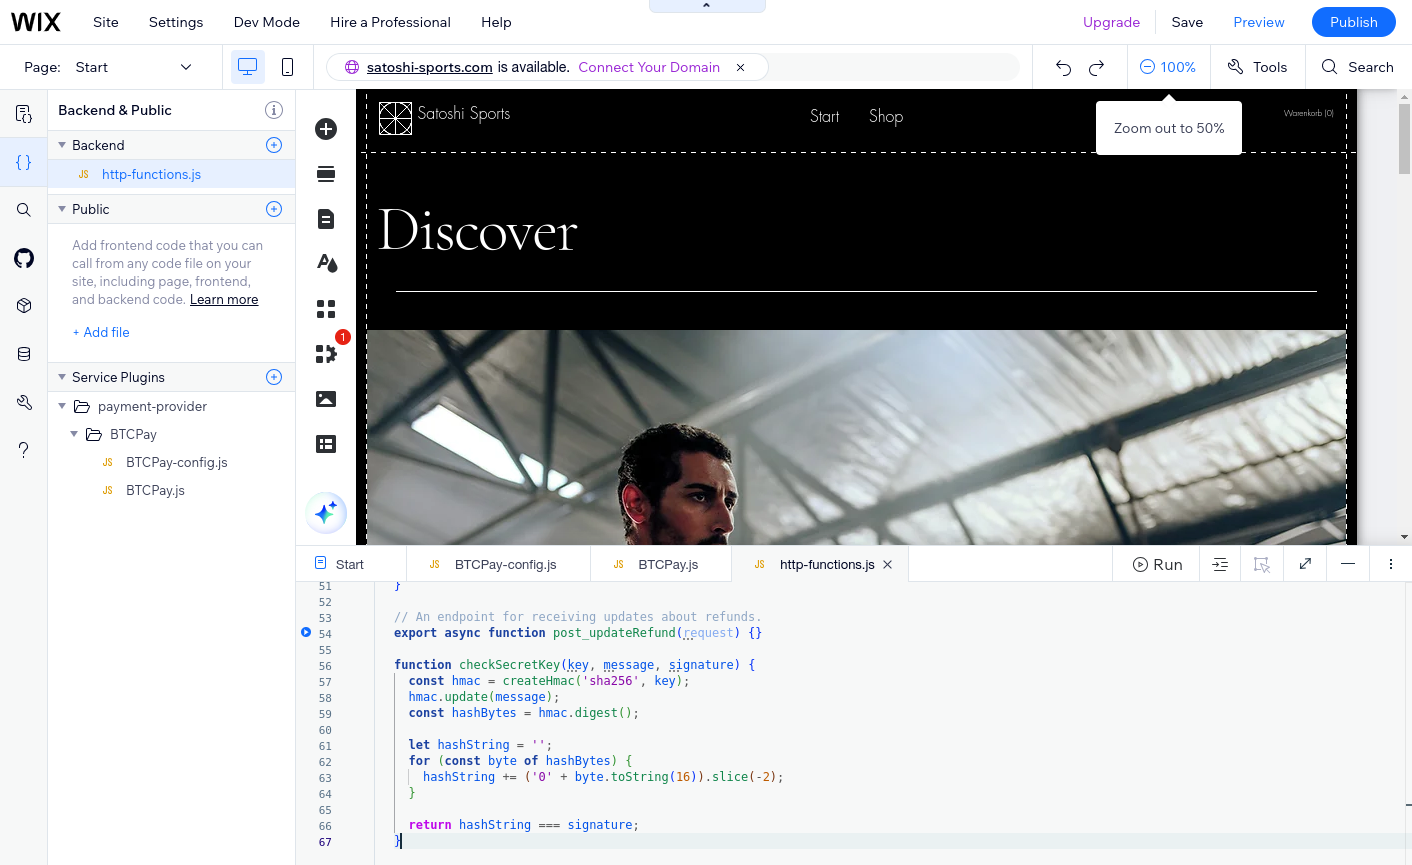
- Now the code is done it is important to click on publish to save the changes and make the plugin available.
# Configure the payment service provider plugin (PSPP)
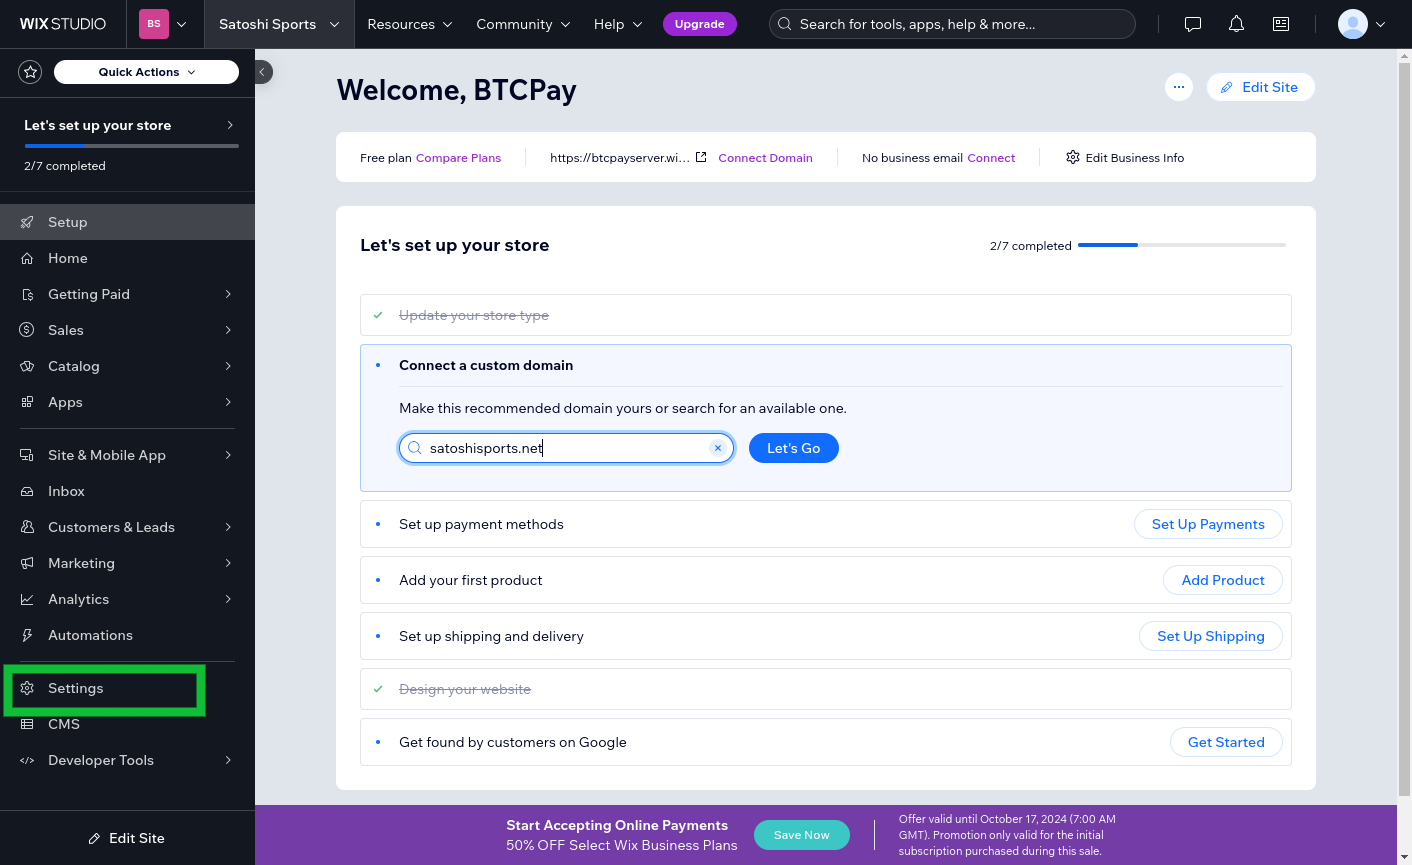
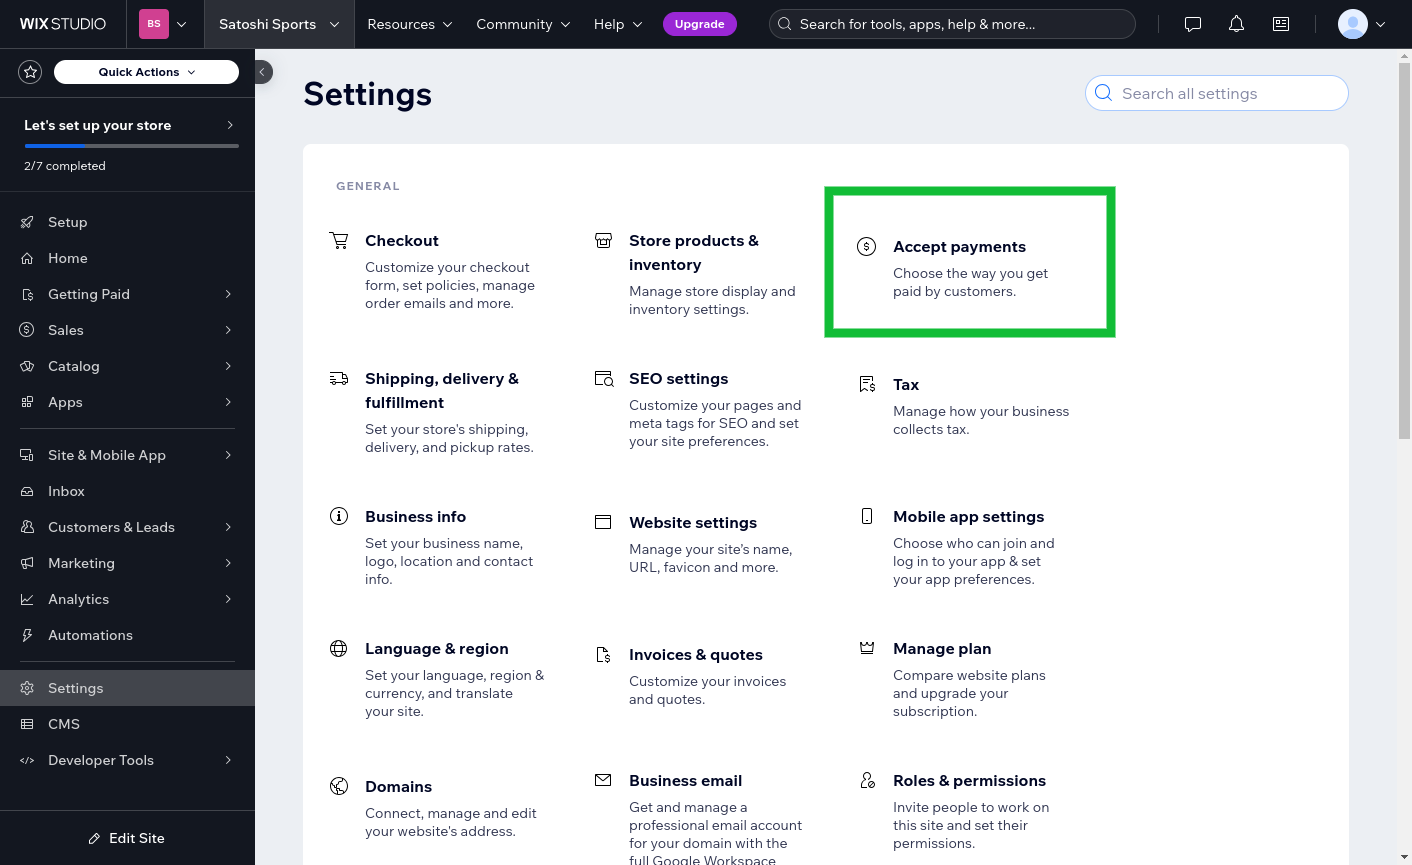
- Go back to your site's dashboard. On the left menu click on "Settings", on that page click "Accept Payments"
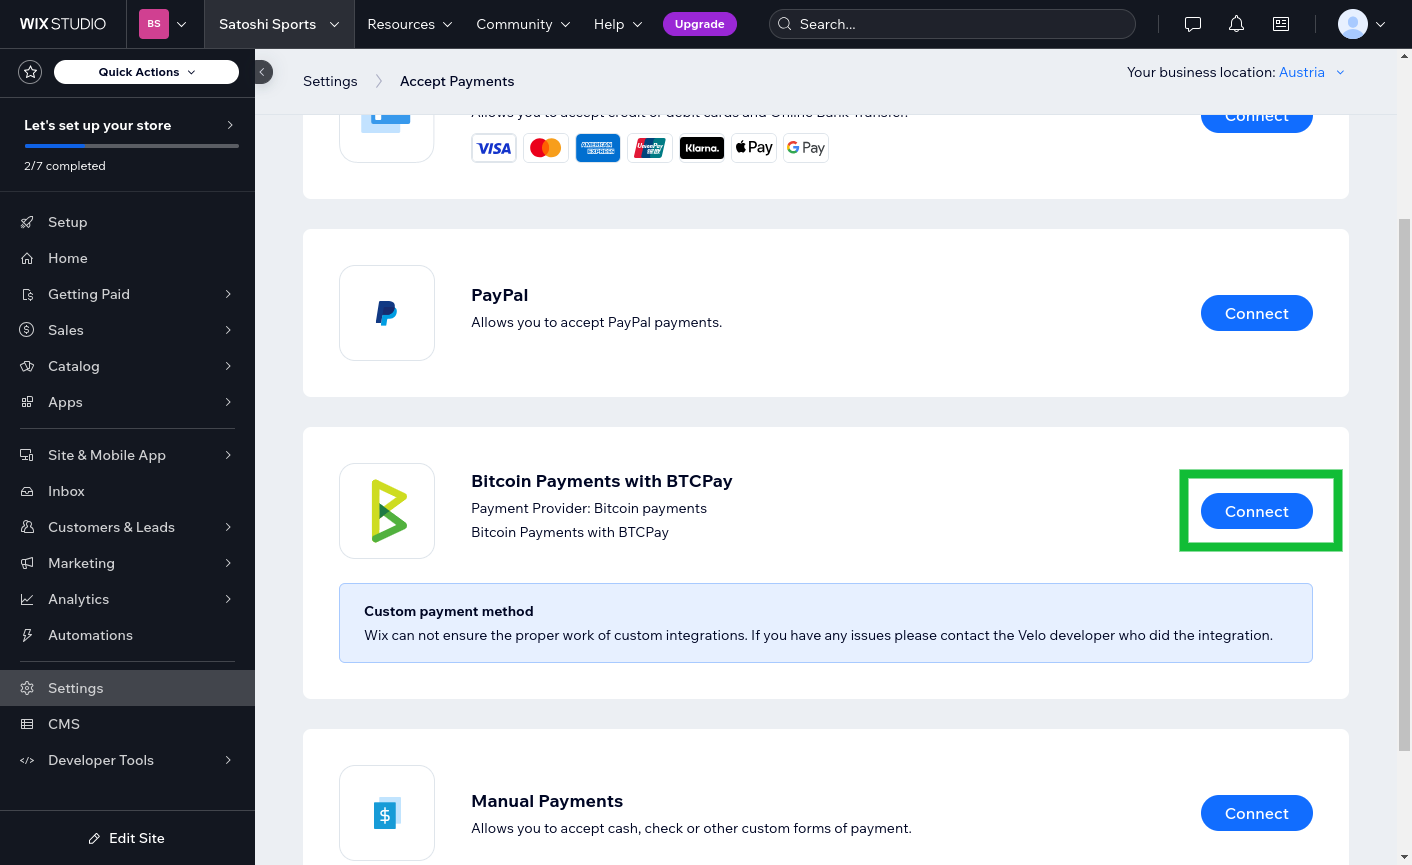
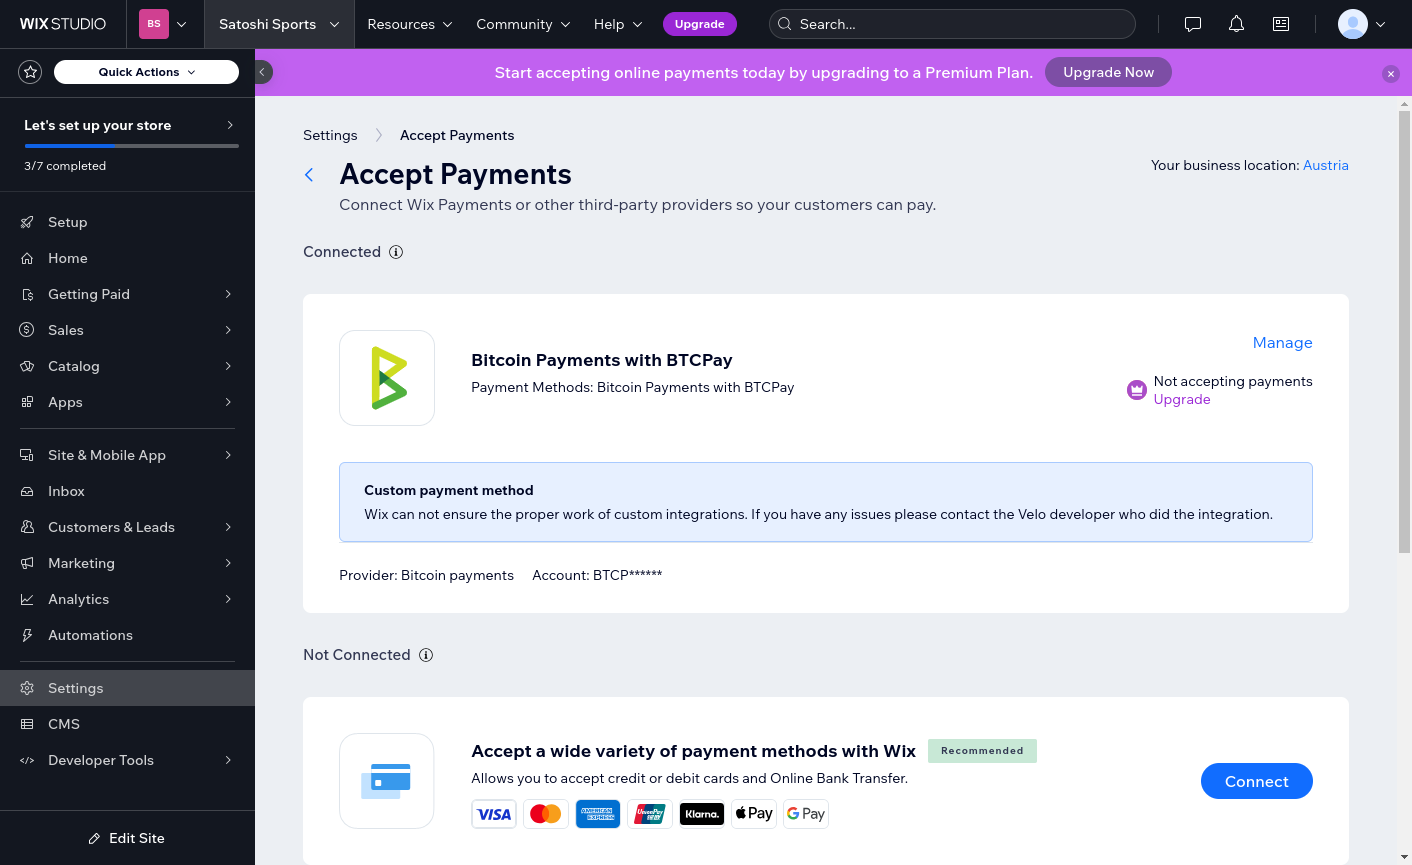
- On the following page, you should see "Bitcoin Payments with BTCPay" as payment provider. If not, try to refresh the page to clear the Wix cache. Click on "Connect"
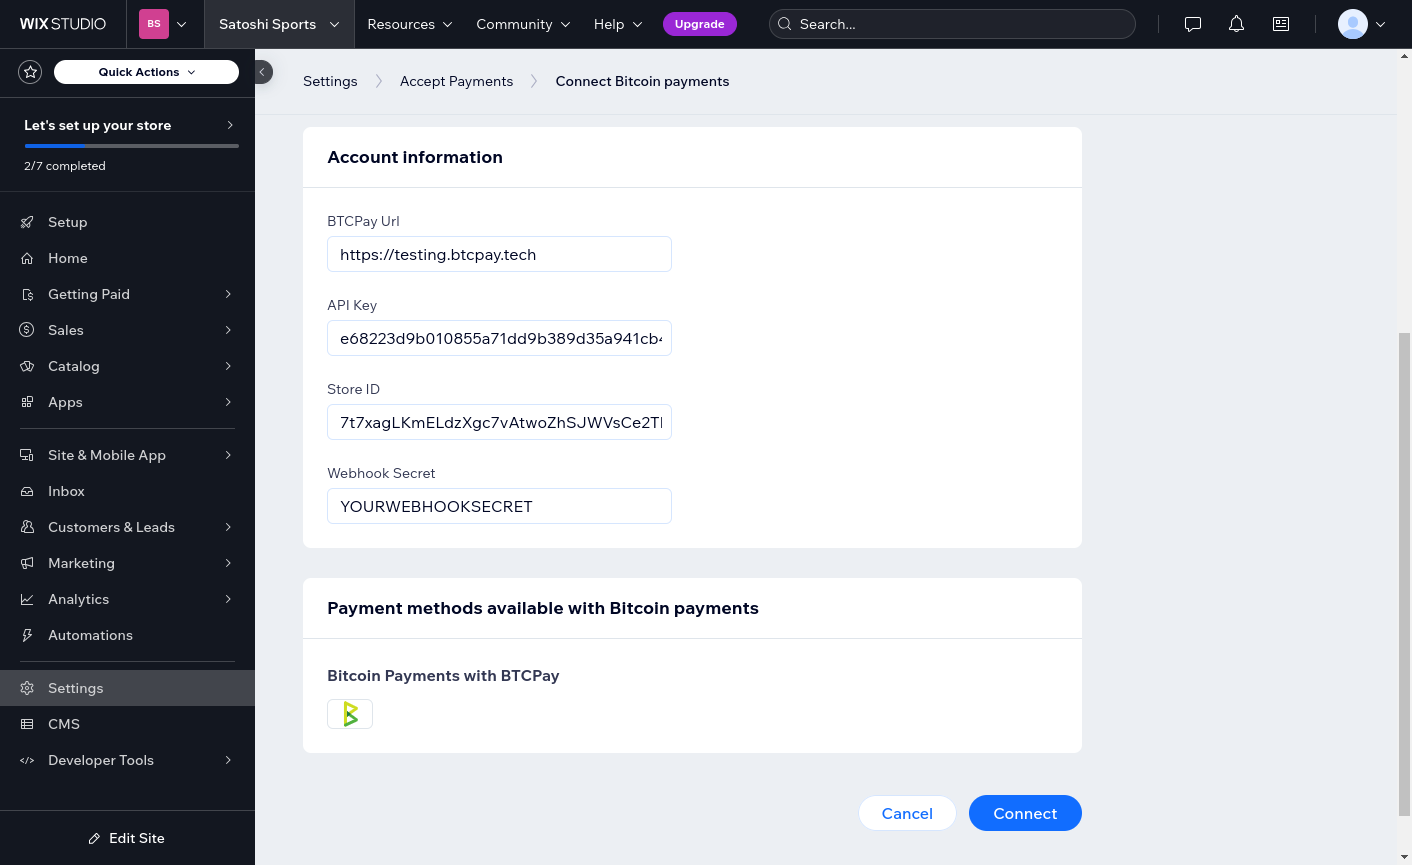
- You are now on the configuration page. You need to enter the following fields:
- BTCPay URL: The URL of your BTCPay Server instance, e.g.
https://btcpay.example.com - API Key: The API key of your BTCPay store
- Store ID: The store ID of your BTCPay store
- Webhook Secret: The webhook secret of your BTCPay store
- BTCPay URL: The URL of your BTCPay Server instance, e.g.
# BTCPay Server URL
- First, enter the "BTCPay Server URL", in our case
https://testing.btcpay.tech - Next, you need to get the API Key, Store ID, and Webhook Secret from your BTCPay store. To do so, log in to your BTCPay store. We assume you already have a store setup, in our guide here it is called "Wix BTCPay Demo"
# API Key
- Go to the API Keys page under "Account" -> "API Keys" (For BTCPay Server versions prior 2.0 it is under "Account" -> "Manage Account" -> "API Keys"). Click on "Generate Key"

- Enter a label such as "Wix API Key".
- For the permissions, click on the "Select specific stores" link and select the store you want to connect to Wix, in our example "Wix BTCPay Demo" - for the following permissions:
View invoices,Create invoice,Modify invoices,Modify stores webhooks,View your stores,Create non-approved pull payments(used for refunds in the future)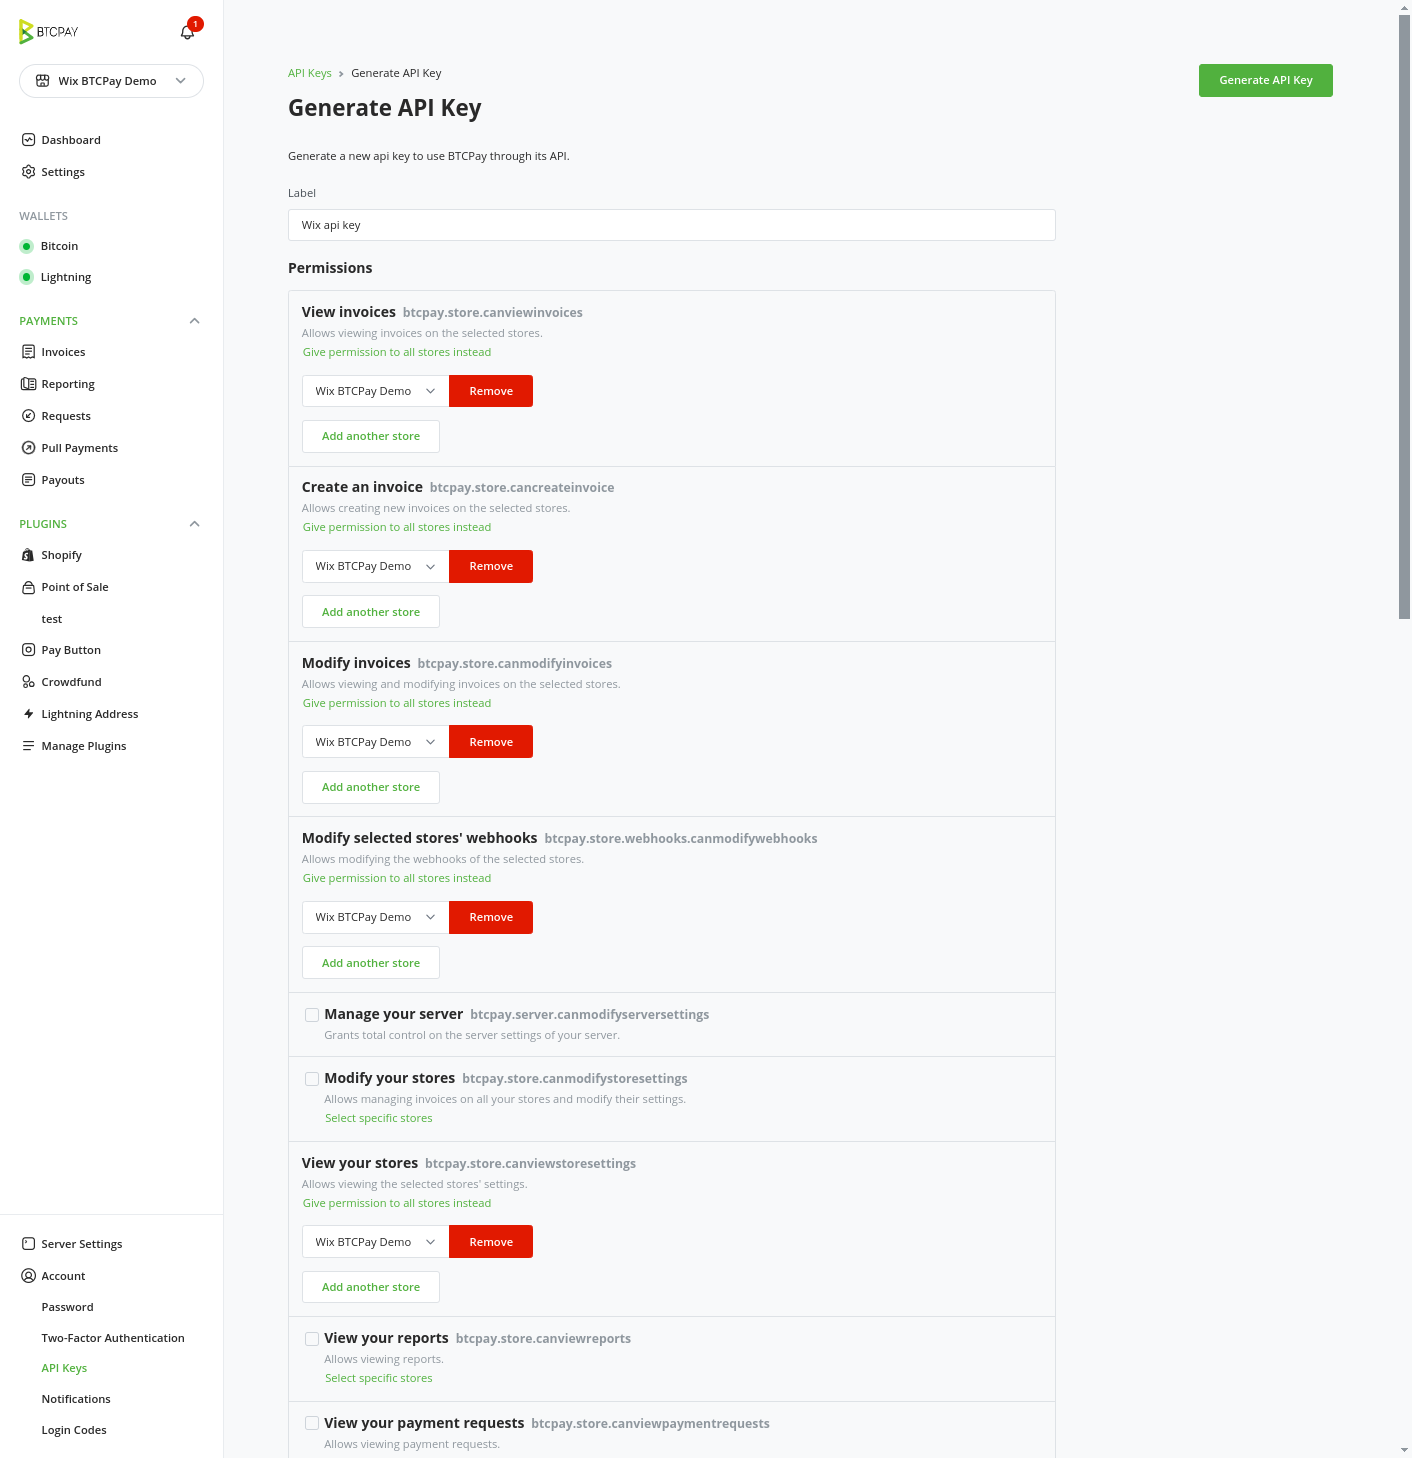
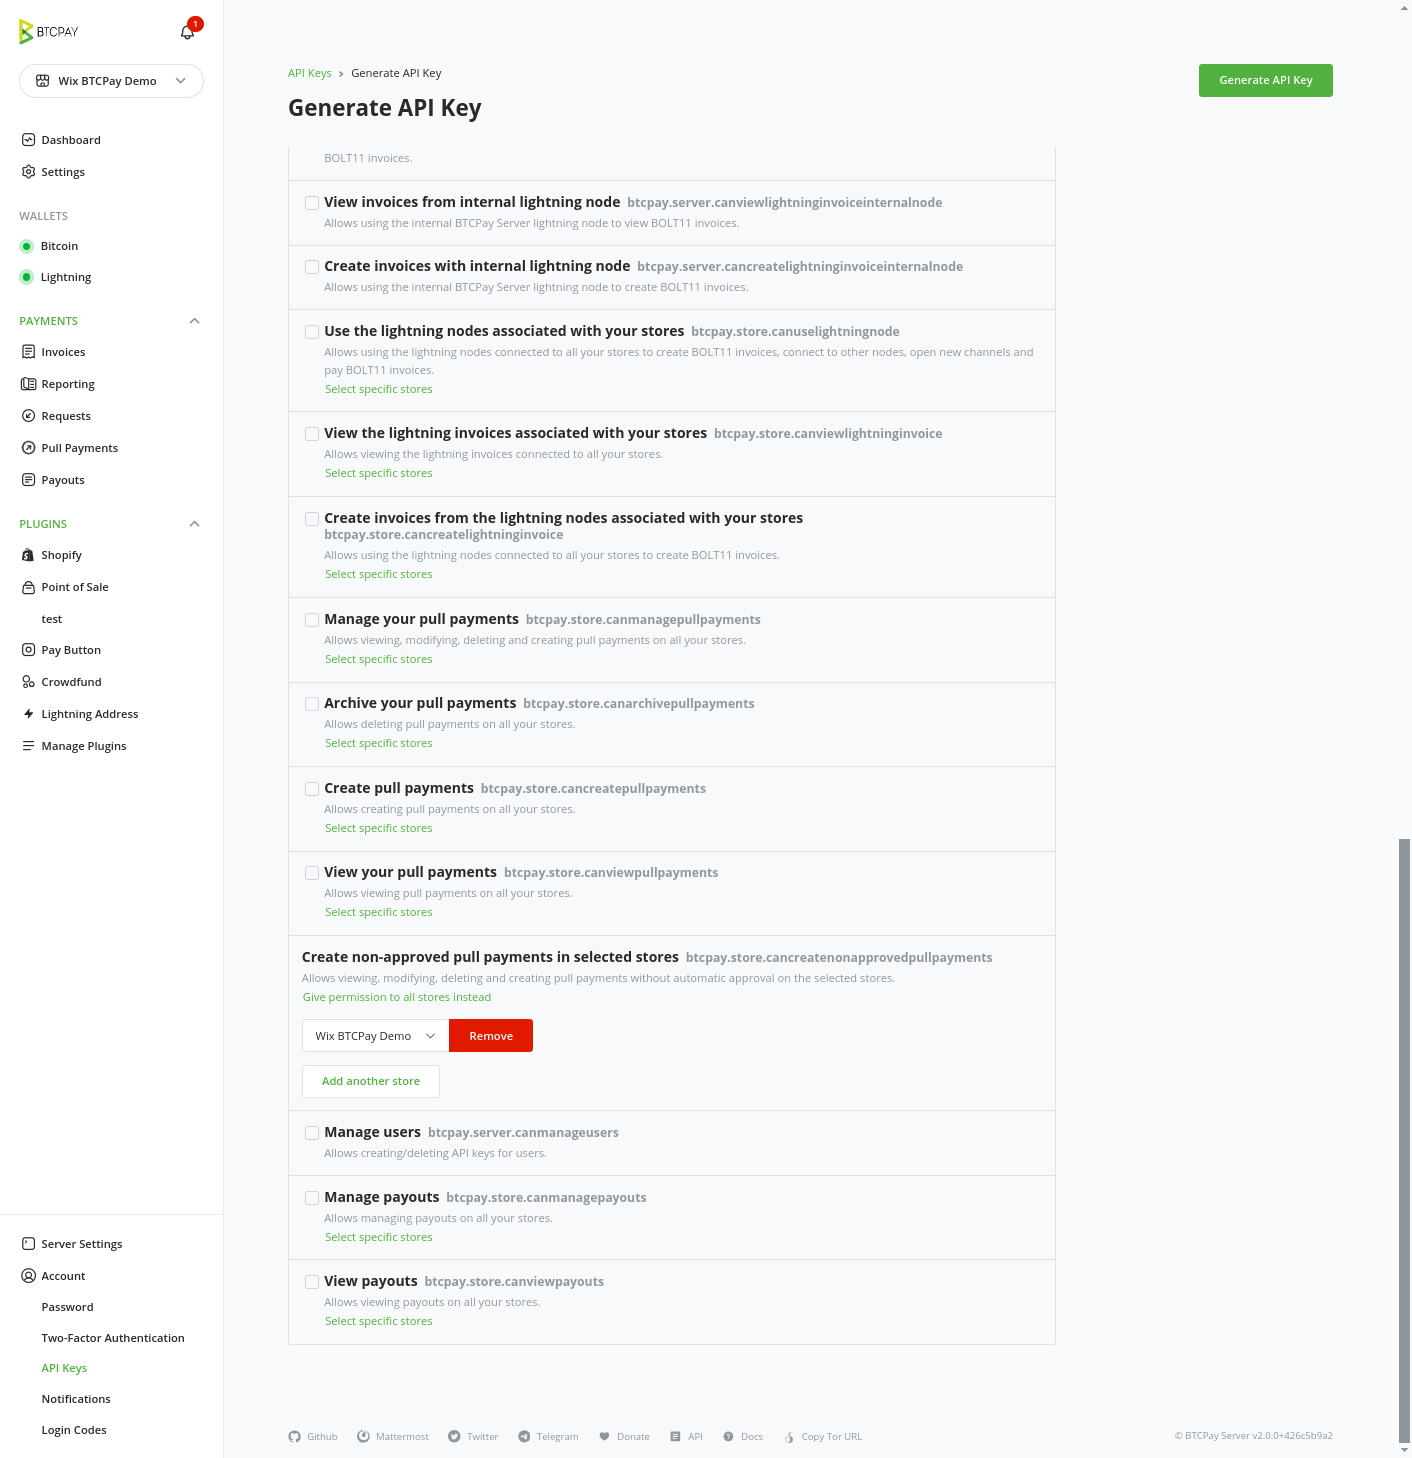
- Click on "Generate API Key" button and on the following page copy the API Key shown at the top

- In your Wix store: paste that copied API key into the "API Key" field
# Store ID
- Go back to your BTCPay store and copy the "Store ID". Go to your store and click on "Settings" and copy the Store ID shown
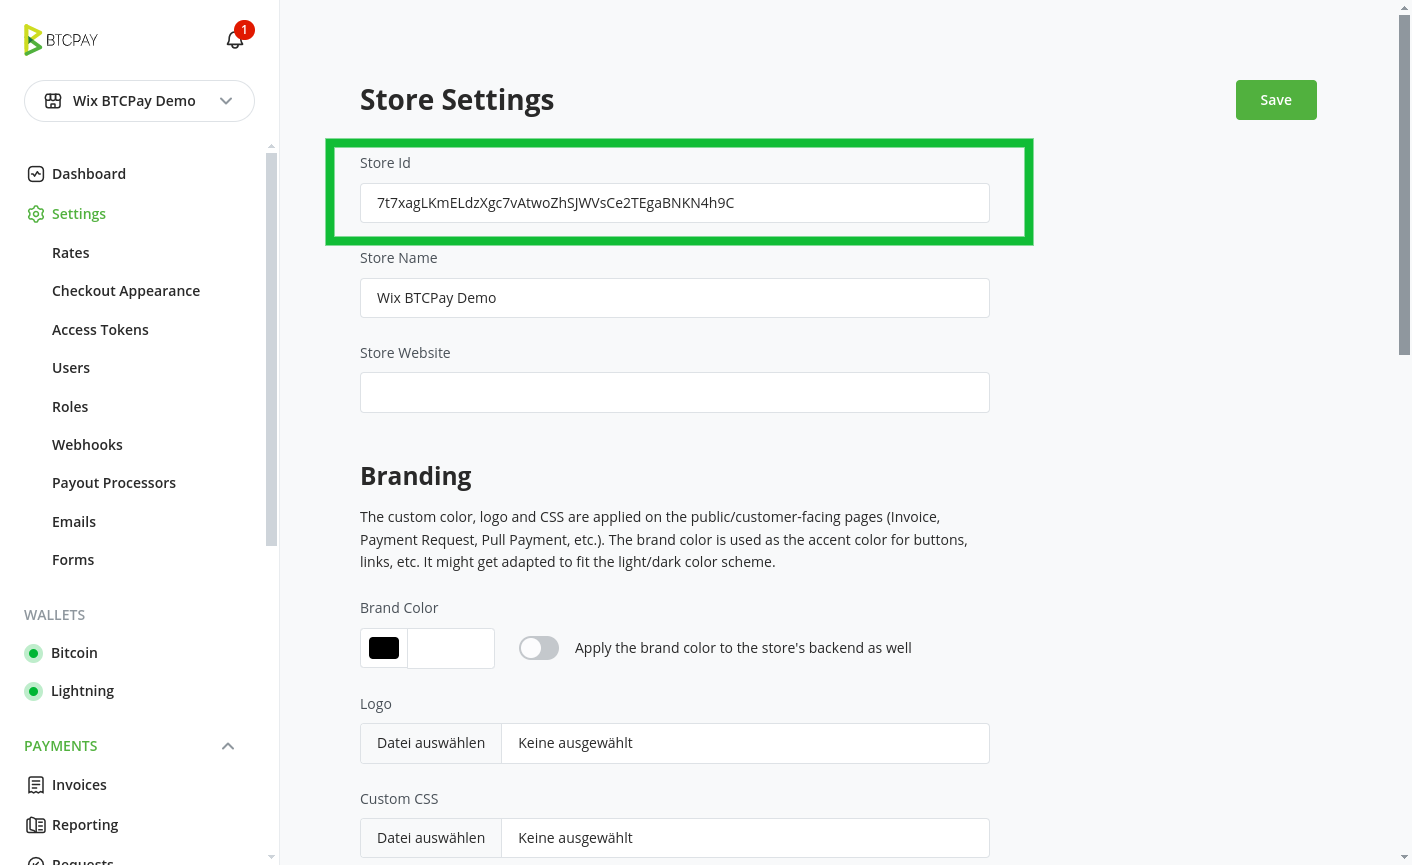
- In your Wix store: paste that copied Store ID into the "Store ID" field
# Webhook Secret
- Go back to your BTCPay store and click on "Settings" -> "Webhooks". Click on "Create Webhook"
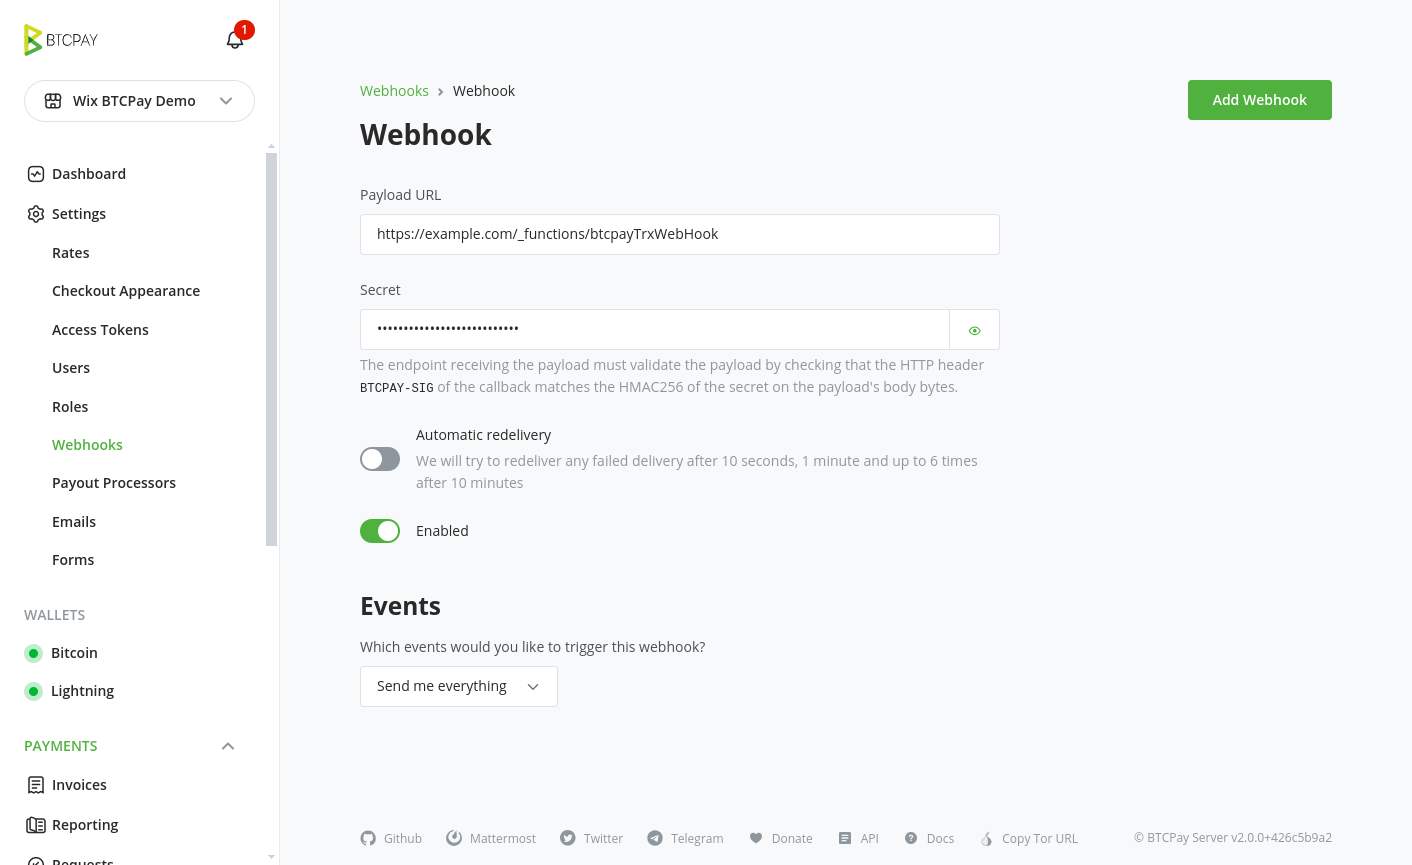
- Payload URL: Your Wix store URL where it can be reached combined with a callback path. E.g.
https://example.com/_functions/btcpayTrxWebHook(replace example.com with your Wix store URL) - Secret: This is auto-generated by BTCPay, you can show it by clicking on the "eye" icon
- Copy the "Secret" and paste it into the "Webhook Secret" field in your Wix store e.g. 'YOURWEBHOOKSECRET' as shown in our example
- Back on BTCPay webhook page, you can leave the other settings as is
- Click on "Add Webhook" to create the webhook on BTCPay. You should see the "The webhook has been created." message
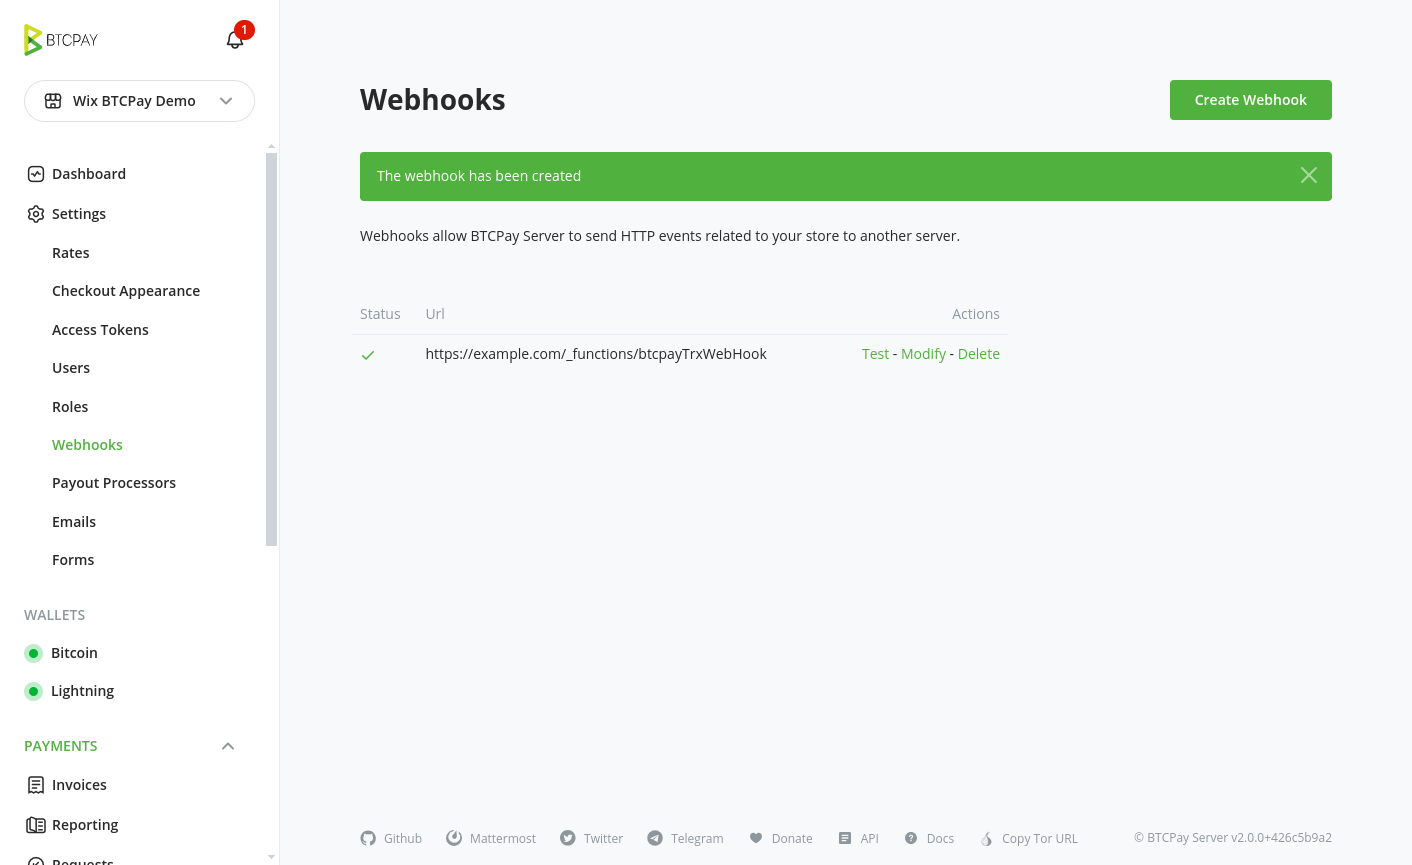
# Save the configuration
- Back in your Wix store, click on "Connect" to save the configuration

# Testing
You are now ready to test your BTCPay integration on your Wix store. Add some products to the cart and go through the checkout process and select "Bitcoin payments with BTCPay"
# Troubleshooting / FAQ
# It does not work, what can I do?
- Make sure you followed the guide step by step and copied the right values into the right places
- In Wix under "Developer tools" select "Logging Tools" and there open the "Wix Logs", it will live log any errors. So try to do the checkout or save the configuration form to see if there is any error.
# After copying the code from the Git repository, I don't see the payment method listed in "Accept payments"
Try to delete the browser cache and reload the page. You can also try to go into editor and click on "Publish" to save the changes. Then reload the payment method list page again.
# How can I change the text of the payment method, "Bitcoin Payments with BTCPay" in the checkout?
You need to go into your Wix Editor and edit the file BTCPay-config.js. You can change the text in the title field
...
hostedPage: {
      title: 'Bitcoin Payments with BTCPay', // change this line
      billingAddressMandatoryFields: ['EMAIL'],
...
# I still have a problem, where can I get help?
Feel free to join our support channel over at https://chat.btcpayserver.org/ (opens new window) if you need help or have any further questions.
