# Connecting Ledger Wallet to BTCPay Server
This document shows how to connect Ledger Nano S Wallet to BTCPay Server.
WARNING
Direct Ledger Nano S integration is no longer supported. For Bitcoin wallets, you can use your Ledger hardware wallet regularly via the new hardware wallet integration.
For altcoin wallets, you can spend funds from your external wallet, sign a transaction within the internal wallet with HD Private Key or mnemonic seed or a hot wallet.
To set up a new altcoin wallet, add the extended public key manually or create a new wallet.
# Ledger Nano S Wallet Setup
This guide assumes, you have a Nano S wallet set up. To configure the Nano S, please see the quick setup guide on manufacturer's website (opens new window).
# Requirements
- Bitcoin App installed on the Ledger
- Google Chrome or Firefox
- For Firefox, U2F needs to be enabled in about:config
- No other U2F devices plugged in into your PC (Yubikey, other wallets, etc)
# Quick Setup
- Plug in Ledger Nano S into your PC.
- Open the Bitcoin app on your Ledger.
- In BTCPay Server, Store > Settings > Wallet > Setup > Derivation Scheme > Import from Hardware Device > Ledger wallet
- Select the account which you want to use, in most cases it's the
Account 0 - Confirm the
Export public keyon the wallet. - The extended public key will now automatically be added from Ledger to your BTCPay Server Store.
- Make sure that the derivation scheme is
Enabled - Click
Continue Confirmthe address match in BTCPay.
Your Ledger wallet is now connected to your BTCPay. Payments go directly to Ledger.
# Manual Setup
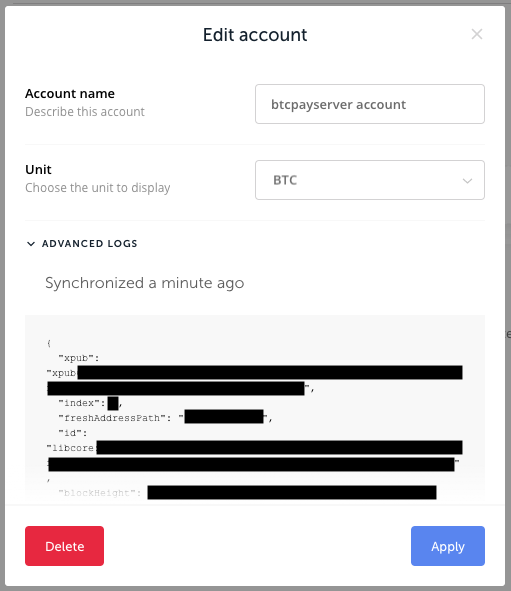
If you have more than 20 accounts in your Ledger you might not be able to find the correct account because the select shows a maximum of 20 entries. In this case you can manually find the extended public key for your wanted account in these steps:
- Open the Ledger live app (opens new window)
- Accounts -> choose your account
- Edit Account on the top right via the tool-icon
- In Edit Account -> ADVANCED LOGS
- Copy the extended public key string
- Paste it manually into the "DerivationScheme" textfield
- Continue with Step 7 of the Quick Setup above

# Spending from BTCPay Server wallet with Ledger
Once there are some funds in received to your BTCPay Wallet connected to Ledger, you can spend them by signing a transaction with your hardware wallet. This allows easy interaction of the Ledger wallet with your full node, without leaking information to third-party servers.
- Plug in Ledger Nano S into your PC.
- Open the Bitcoin app on your Ledger.
- In BTCPay, go to Wallets > Manage > Send
- Fill in destination address and the amount
- Click on the Sign with
your Ledger Wallet device. - BTCPay will establish a connection with the Ledger wallet and display transaction information on the wallet screen.
- Confirm the transaction on the Ledger.
- In Ledger, click on the
Ready To Sign - Review your transactions and click
Broadcastto broadcast it on the network.
The video below shows how to connect your BTCPay store to your Ledger and how to use Ledger with the internal BTCPay wallet.
